

Pre-commit hooks are simple, automated scripts that check your code before you can commit it to a repository. They’re your first line of defence, making sure quality and security standards are baked in right from your local machine. This stops simple mistakes from ever polluting the shared codebase.
The Gatekeeper Your Codebase Needs
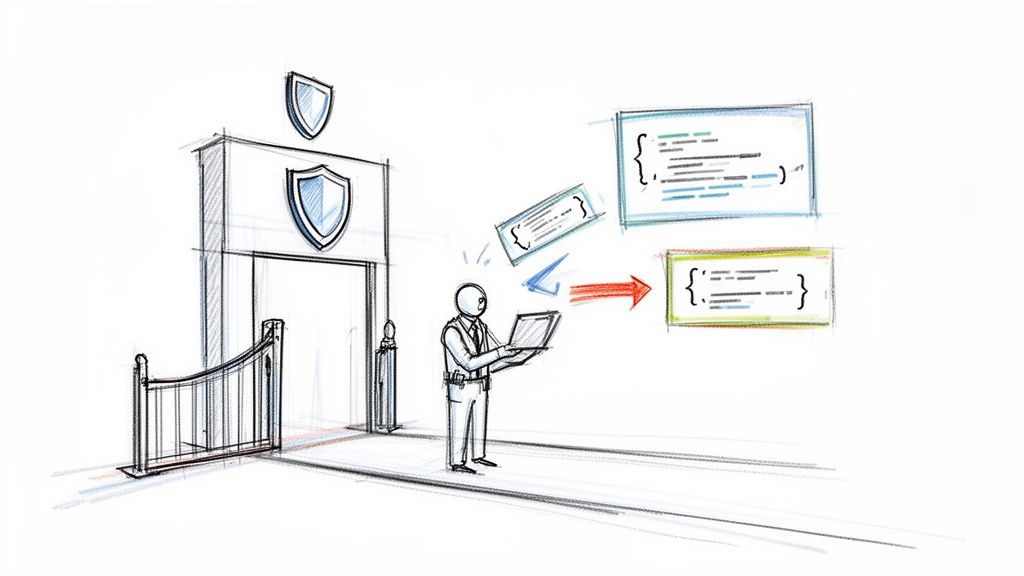
Imagine a meticulous security guard standing at the only entrance to your project’s code repository. This guard has a strict checklist and inspects every single contribution before it’s allowed inside. This is the exact job of pre-commit hooks in a modern development workflow.
They are small, automated scripts that fire up every time a developer tries to run a git commit. If a script flags an issue—whether it’s a syntax error, a formatting mess, or even a hardcoded secret like an API key—the commit is blocked on the spot.
The best part? The developer gets instant feedback right there in their terminal, letting them fix the problem immediately. It’s this local, instantaneous feedback loop that makes pre-commit hooks so powerful.
Why Does This Matter?
Without this gatekeeper, small but preventable errors constantly slip into the main codebase. A misplaced comma or inconsistent formatting might seem trivial, but these tiny issues accumulate. They lead to broken builds, wasted hours for other developers who have to track them down, and an unnecessary burden on your Continuous Integration (CI) systems.
Think of it like a quality control checkpoint on an assembly line. It’s far more efficient to catch a defect early than to wait until the final product is fully assembled and ready to ship. Pre-commit hooks bring that same logic to software development.
By catching errors locally, pre-commit hooks shift quality control left, putting it directly into the developer’s hands. This proactive approach stops a cascade of problems downstream, saving everyone valuable time and resources.
Common Issues Caught by Pre-Commit Hooks
So, what kind of trouble can these automated checks actually prevent? The goal is to enforce consistency and stop common mistakes that machines spot easily but human eyes often miss. They can be configured to catch a huge range of problems before they become a shared headache for the team.
This table summarises some of the typical problems that pre-commit hooks can automatically detect and prevent before they ever enter your codebase.
| Issue Category | Specific Example | Impact if Unchecked |
|---|---|---|
| Code Formatting | Inconsistent indentation, line length, or bracket placement. | Reduced readability and messy diffs that are hard to review. |
| Linting Errors | Unused variables, potential null pointer exceptions, or code anti-patterns. | Increased risk of bugs, technical debt, and broken builds. |
| Security Vulnerabilities | Hardcoded API keys, passwords, or private SSH keys. | Severe security breaches, data leaks, and unauthorised access. |
| Syntax Errors | Invalid JSON, YAML, or XML file syntax. | Broken configurations, failed deployments, and runtime errors. |
| Commit Message Style | Messages not conforming to a standard like Conventional Commits. | Inconsistent commit history, difficult-to-generate changelogs. |
These are just a few examples. By automating these checks, you establish a consistent quality baseline for every single piece of code that enters your repository. This ultimately frees up your developers to focus on solving complex problems, not policing style guides in code reviews.
Why Pre Commit Hooks Are Essential for IoT
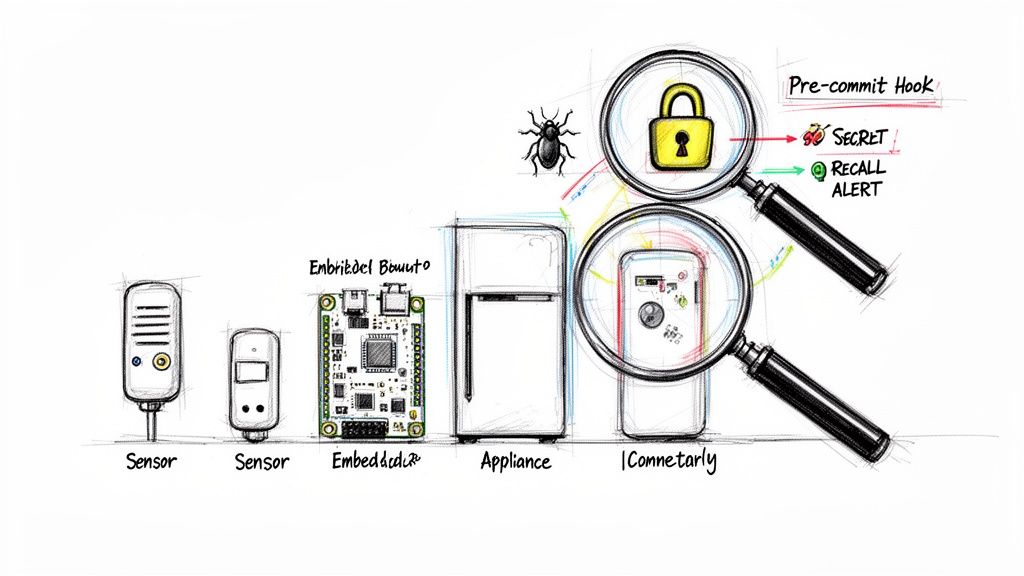
In the world of IoT and embedded systems, a single bug carries a lot more weight than in typical web development. A flawed firmware update doesn't just crash a website; it can trigger expensive physical recalls, open up dangerous security holes, or lead to serious compliance failures.
This high-stakes environment demands a development process that’s as close to bulletproof as possible.
This is exactly where pre-commit hooks become indispensable. Think of them as an automated, proactive line of defence, ensuring that fundamental quality and security checks run before any code gets shared. For hardware-centric projects, this local-first validation is a game-changer, stopping simple mistakes from ever reaching the main repository or a complex CI/CD pipeline.
Enforcing Consistency Across Teams
IoT projects often involve large, distributed teams working on different parts of the stack, from low-level C++ firmware to cloud services written in Python. Getting everyone to write code that looks and feels the same is a monumental challenge. When code is inconsistent, it’s harder to read, debug, and maintain—which is a recipe for introducing defects into long-lived device firmware.
Pre-commit hooks solve this by enforcing a universal standard automatically. By setting up a shared configuration, every developer—no matter what they’re working on—adheres to the same formatting and linting rules. This creates a unified codebase that is far easier to manage over the device's entire lifecycle. You can learn more about how this fits into a broader strategy by exploring what is required for a secure software development life cycle.
Take a common example: enforcing a specific C++ style guide, like Google's, using a tool like clang-format.
// Before pre-commit hook
int myFunction(int arg1,int arg2){
if(arg1>arg2) {return arg1;}
else {return arg2;}
}

// After pre-commit hook with clang-format
int myFunction(int arg1, int arg2) {
  if (arg1 > arg2) {
    return arg1;
  } else {
    return arg2;
  }
}
This simple, automated formatting lets code reviews focus on logic and function, not arguments over brace placement.
Preventing Critical Security Blunders
One of the most common—and dangerous—mistakes in connected device development is accidentally committing sensitive information. Things like API keys, credentials, or private certificates should never end up in a Git repository. In an IoT context, a leaked key could give an attacker control over an entire fleet of physical devices, with catastrophic results.
Pre-commit hooks can be set up to scan code for these secrets before a commit is even finalised. For instance, a hook using a tool like gitleaks would block a commit containing code like this:
# main.py
api_key = "sk_live_123abc456def789ghi" # DANGER: Hardcoded secret!
client = MqttClient(api_key)
client.connect()
The developer's terminal would show an error, preventing the key from ever leaving their machine.
Using tools that automatically check for hardcoded secrets, pre-commit hooks act as a vital safety net. They prevent a simple developer oversight from turning into a major security incident that could compromise thousands of devices in the field.
These hooks can also integrate with static analysis security testing (SAST) tools to find common vulnerabilities, like buffer overflows in C code, right on the developer's own machine.
Boosting Development Velocity and Efficiency
Finally, pre-commit hooks take a significant load off your CI/CD systems. For embedded projects, CI pipelines can be slow and resource-intensive, often involving cross-compilation and even hardware-in-the-loop testing. Catching simple linting or formatting errors locally saves valuable build minutes and gives developers much faster feedback.
This isn't just a theoretical gain. A case study from a VC-backed SaaS platform in the EU found that after standardising pre-commit frameworks, their developer velocity for code merges improved by 30% in just two sprints. Even more impressively, their CI resource usage dropped by 40%, all by eliminating trivial build failures that used to eat up costly compute time. You can read more about these efficiency gains and how to achieve them in the full case study analysis.
This rapid feedback loop is crucial for keeping IoT projects on schedule and within budget.
How to Implement Pre-Commit Hooks
Alright, let's move from theory to practice. Understanding what pre-commit hooks are is one thing, but actually setting them up to automatically guard your codebase is where the real power kicks in.
This section is a hands-on walkthrough of three popular ways to get hooks running, with practical examples tailored for IoT and embedded development. We'll look at native Git hooks for simple, direct control, the powerful pre-commit framework for managing a whole toolbox of checks, and Husky for projects rooted in the Node.js ecosystem. Each one strikes a different balance between simplicity, power, and team scalability.
Method 1: Native Git Hooks
The most direct route is using the functionality built right into Git itself. Every Git repository contains a hidden .git/hooks directory, which is populated with a set of sample scripts. To bring a hook to life, you just need to create an executable script with the correct name in this directory—in our case, pre-commit.
The beauty of this method is its simplicity. It requires zero external dependencies, making it incredibly lightweight for simple, repository-specific checks. The main catch? The .git directory isn't version-controlled, so these hooks aren't automatically shared with your team. Everyone has to set them up manually.
Let's walk through a classic example: a simple shell script to block commits that contain trailing whitespace, a common source of messy code diffs.
- Navigate to your project's
.git/hooksdirectory. - Create a new file named
pre-commit. - Add the following shell script content to the file:
#!/bin/sh

# Check for trailing whitespace
if git diff --check --cached | grep -q 'trailing whitespace'; then
  echo "Error: Trailing whitespace detected. Please fix before committing."
  exit 1
fi

# If the check passes, exit with 0 to allow the commit
exit 0
- Finally, make the script executable by running
chmod +x .git/hooks/pre-commit.
That's it. Now, if a developer tries to commit a file with rogue spaces at the end of a line, Git will run this script, spot the issue, print the error, and block the commit cold.
Method 2: The Pre-Commit Framework
For more complex projects—especially in IoT where you might be juggling multiple languages—managing individual hook scripts quickly becomes a headache. This is where the open-source pre-commit framework really shines. It lets you define and manage all your hooks in a single, version-controlled YAML file: .pre-commit-config.yaml.
This framework makes it incredibly easy to pull in hooks developed by the community, automatically handling the installation and execution of tools like formatters and linters. For most teams, this is the way to go. It scales beautifully and is dead simple to maintain. Many of these automated checks fall under the umbrella of static analysis, a topic we cover in more detail in our guide on what is static code analysis.
Here’s what a .pre-commit-config.yaml might look like for a typical embedded project using Python and C/C++:
repos:
-   repo: https://github.com/pre-commit/pre-commit-hooks
    rev: v4.6.0
    hooks:
    -   id: check-yaml
    -   id: end-of-file-fixer
    -   id: trailing-whitespace

-   repo: https://github.com/psf/black
    rev: 24.4.2
    hooks:
    -   id: black

-   repo: https://github.com/pycqa/flake8
    rev: 7.1.0
    hooks:
    -   id: flake8

-   repo: https://github.com/pocc/pre-commit-hooks
    rev: v1.3.5
    hooks:
    -   id: clang-format
        args: [-i]
To get this working, a developer just needs to install the framework (pip install pre-commit) and run pre-commit install once. From then on, the framework automatically manages and runs the specified checks—like black for Python formatting and clang-format for C/C++—before every single commit.
Method 3: Husky for Node.js Environments
If your project’s tooling leans on Node.js (which is common for building web interfaces for IoT devices or for JavaScript-based build systems), then Husky is the industry standard for managing Git hooks. Husky makes it trivial to run scripts defined in your package.json file during any Git event.
It’s often paired with lint-staged, a clever tool that runs linters and formatters only on the files that are staged for the current commit. This combination is incredibly efficient because it avoids checking the entire project every time, leading to a much faster, smoother developer experience.
By running checks only on staged files, the combination of Husky and lint-staged provides incredibly fast feedback. This prevents developer friction while still ensuring that no poorly formatted or linted code ever enters the repository.
Here’s a quick recipe for setting it up:
- Install the necessary packages:
npm install --save-dev husky lint-staged - Activate Husky hooks:
npx husky init - Create a hook that runs
lint-staged:npx husky add .husky/pre-commit "npx lint-staged" - Configure
lint-stagedin yourpackage.jsonto tell it which commands to run on which files:
"lint-staged": {
  "*.{js,jsx,ts,tsx}": "eslint --fix",
  "*.{json,md,css}": "prettier --write"
}
With this setup in place, any time a developer commits JavaScript or CSS files, Husky will trigger lint-staged. It will then run ESLint and Prettier to automatically fix and format just the staged files before the commit is finalised.
Comparison of Pre-Commit Implementation Methods
Choosing the right way to manage your hooks depends on your project's specific needs, your team's workflow, and the complexity of the checks you want to run. Each of the methods we've covered has its own strengths and trade-offs.
To help you decide, here's a quick breakdown comparing native Git hooks, the pre-commit framework, and Husky.
| Method | Best For | Ease of Setup | Team Scalability |
|---|---|---|---|
| Native Git Hooks | Simple, individual checks in a solo or small project. No external dependencies needed. | Low (just an executable script). | Poor. Hooks are not version controlled. |
| Pre-Commit Framework | Most teams, especially in polyglot projects. Managing multiple, complex hooks. | Medium (requires Python, but config is easy). | Excellent. Hooks are managed in a version-controlled file. |
| Husky | Projects heavily invested in the Node.js/JavaScript ecosystem. | Medium (NPM-based setup). | Excellent. Integrates with package.json and version control. |
Ultimately, the goal is the same: to find a system that makes it easy for your team to maintain code quality without creating unnecessary friction. For most modern development, a framework-based approach like pre-commit or Husky is the clear winner because it ensures consistency for everyone working on the codebase.
Automating CRA Compliance Checks
The Cyber Resilience Act (CRA) isn't just another box-ticking exercise; it represents a fundamental change in how we manage and prove secure development. For anyone building connected devices for the EU market, the CRA brings serious new rules for vulnerability management, technical documentation, and supply chain security. This is where pre-commit hooks transform from a handy developer tool into a powerful, automated compliance engine.
By baking CRA-specific checks right into your development workflow, you start building a live, auditable trail of compliance from the very first commit. This proactive stance turns what could be a burdensome regulatory task into a natural, seamless part of how you build products.
The three main ways to implement pre-commit hooks are shown below, each offering a different path to automating these vital checks.
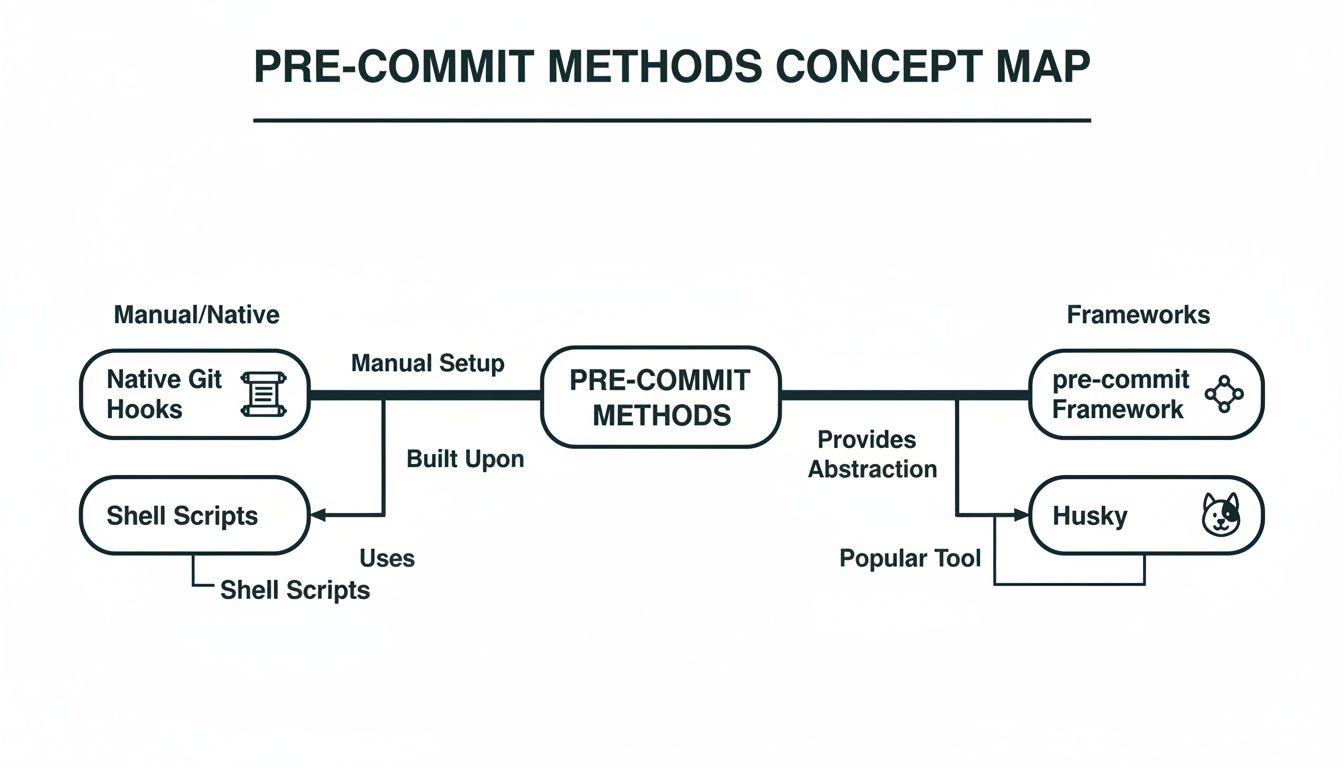
While native Git hooks are simple to get started with, frameworks like pre-commit and Husky give you the scalable and shareable structure needed to enforce compliance policies consistently across your entire organisation.
Enforcing Traceability with Structured Commits
A central theme of the CRA is traceability—the ability to link every single code change to a specific requirement, bug fix, or security update. Pre-commit hooks are perfect for enforcing this by mandating structured commit messages.
Imagine a developer is about to push a fix for a newly found vulnerability. A pre-commit hook can jump in, analyse their commit message, and check that it follows a strict pattern, like including a Jira ticket number or a CVE identifier.
Here's an example of a blocked commit and a successful one:
- BLOCKED:
git commit -m "fixed a bug" - ALLOWED:
git commit -m "feat(auth): Add rate limiting - Resolves TICKET-123"
If the message is just "fixed a bug," the commit gets blocked. The hook can then show a helpful message explaining the required format. This simple, automated gatekeeper guarantees that every change is tied to a documented task, creating an invaluable audit trail for compliance assessments.
Proactive Vulnerability and SBOM Management
The CRA puts a huge emphasis on managing vulnerabilities in your product and all its dependencies. A big part of this is keeping an accurate Software Bill of Materials (SBOM) up to date. Pre-commit hooks can automate crucial parts of this work long before bad code even thinks about hitting a central repository.
You can set up hooks to run dependency scanners like pip-audit for Python or npm audit for Node.js projects. If a developer tries to commit code that pulls in a dependency with a known high-severity vulnerability, the hook stops the commit dead in its tracks and flags the problem immediately.
This local-first scanning is a game-changer for CRA compliance. It prevents vulnerable components from ever entering the main codebase, drastically reducing the attack surface and simplifying vulnerability management downstream.
In the same way, a custom hook can check if a code change that adds or removes dependencies also triggers an update to the project's SBOM file. This ensures your SBOM is never out of date, which is a key requirement for transparency and security assessments under the CRA. For a deeper dive, you can learn more about specific CRA SBOM requirements in our detailed guide.
Aligning with Broader EU Digital Strategy
Adopting robust DevSecOps practices like pre-commit hooks does more than just get you ready for the CRA. It also aligns your organisation with the European Union's wider strategic goals for a secure digital infrastructure.
The European Commission's €307.3 million investment in AI and digital services, announced through the Horizon Europe programme, makes this commitment clear. For IoT vendors and manufacturers using platforms like Regulus to prepare for CRA deadlines, implementing pre-commit hooks is a foundational step that aligns directly with these EU priorities for a secure and sovereign digital market.
By integrating these automated checks, pre-commit hooks become much more than just developer tools. They are transformed into an active compliance framework that provides tangible, ongoing evidence of your secure development practices, helping you meet CRA obligations efficiently and effectively.
Managing Hooks Across Your Organisation
Putting pre-commit hooks in place for one developer or a small team is one thing. Getting every single developer across a large engineering organisation to follow the same quality and security rules? That's a much bigger challenge. Without a unified strategy, you end up with fragmented, inconsistent policies that defeat the whole purpose of using hooks.
To scale pre-commit hooks successfully, you have to move beyond individual setups. The goal is a centralised, version-controlled system. This gives you a single source of truth for your quality gates, making sure every commit—no matter the project or team—meets the same high bar for security and code hygiene. This consistency is crucial for keeping a clean codebase and for simplifying processes like managing your product lifecycle for CRA compliance.
Centralising Your Hook Configurations
The best way to guarantee consistency is to create a dedicated, version-controlled repository that holds your organisation's shared pre-commit configurations. Think of it as a "meta-repository" that lays down the law for all your other projects. Project teams can then simply reference this central configuration in their own .pre-commit-config.yaml files.
This approach brings some powerful benefits:
- Uniform Standards: It ensures that core checks—like secret scanning with Gitleaks or code formatting with
black—are applied everywhere, without exception. - Simplified Updates: Need to update a hook version or add a new global check? You only change it in one place. Every project automatically inherits the update.
- Easy Onboarding: New projects can become compliant instantly just by pointing to the central configuration file.
For instance, your central repository might have a file called company-hooks.yaml. Individual projects would then reference it like this:
# In an individual project's .pre-commit-config.yaml
repos:
-   repo: https://your-internal-git.com/hooks/company-hooks
    rev: v1.2.0  # Pin to a specific version for stability
    hooks:
    -   id: gitleaks
    -   id: ruff-format
Testing and Performance Management
As your collection of pre-commit hooks grows, you absolutely must treat them like any other piece of production software. That means they need to be tested thoroughly. A slow or buggy hook will cause immense frustration and just lead developers to bypass the checks, making them useless.
A pre-commit hook that is slow or unreliable creates friction and actively discourages adoption. The goal is to make compliance seamless, not to add another roadblock to a developer's workflow.
To get this right, you should establish a few key practices:
- Isolate and Test Hooks: Before you roll out a new hook, test it in an isolated environment to check its behaviour and, critically, measure its performance.
- Monitor Execution Time: Keep a close eye on how long the entire hook suite takes to run. If checks start taking more than a few seconds, developers will feel the drag. Prioritise the fast, essential checks.
- Provide Clear Error Messages: When a hook fails, the output has to be crystal clear. It must tell the developer exactly what went wrong and, ideally, how to fix it. A cryptic error message is worse than no check at all.
Implementing a Safe Bypass Mechanism
While hooks should feel mandatory, there will always be that rare emergency where a developer needs to commit code right now without waiting for checks. For those moments, Git gives you a built-in escape hatch: the --no-verify flag.
But using this bypass should be a rare, audited event. A good system doesn't just allow bypasses; it controls and monitors them. You should implement a policy where using --no-verify requires a justification, maybe right in the commit message or in an associated ticket.
Even better, configure your CI/CD pipeline to always run the full suite of checks on any commit that used the bypass flag. This ensures nothing slips through to production unverified, making the system robust but not rigid.
Common Questions About Pre-Commit Hooks
As teams start weaving pre-commit hooks into their development rhythm, a few common questions and roadblocks tend to pop up. Tackling these head-on makes the whole process smoother and helps everyone see the new checks as helpful guardrails, not frustrating obstacles.
This section gives you practical, straight-to-the-point answers to the queries we hear most often from developers dipping their toes into pre-commit hooks for the first time.
What Should I Do if a Pre-Commit Hook Fails?
First off, don’t panic. A failing hook isn't an error in the system; it's the system working exactly as it should. It just flagged a potential issue on your machine before it had a chance to become a problem for the rest of the team. Think of it as a friendly, automated code reviewer tapping you on the shoulder.
The workflow for handling a failure is pretty straightforward:
- Read the Output: The terminal message is your best friend here. A well-written hook will tell you precisely which check failed (e.g.,
flake8,gitleaks), which file is the culprit, and often the exact line number causing the fuss. - Fix the Underlying Problem: Pop open the flagged file and make the correction. This could be anything from reformatting a messy block of code to removing a hardcoded API key you accidentally pasted in.
- Stage the Changes: Once you've fixed the code, use
git addto stage the corrected file again. - Re-run the Commit: Just try your
git commitcommand again. The hooks will run once more, and if your fix was good, the commit will go through without a hitch.
Many hooks, especially formatters like black or prettier, can even be set up to fix issues for you automatically. When they run and spot a problem, they just correct the file on the spot. All you have to do is stage the changes they made and re-commit.
Can I Bypass a Pre-Commit Hook in an Emergency?
Yes, you can. While pre-commit hooks are designed as a mandatory quality gate, Git gives you a built-in escape hatch for those rare moments when you absolutely must commit something immediately without running the checks. This is done with the --no-verify flag.
git commit -m "Emergency fix for critical outage" --no-verify
Use this command with extreme caution, though. Bypassing your hooks means you are deliberately skipping the automated checks for code style, linting, and security scanning.
The
--no-verifyflag is a powerful tool for emergencies, but it should be the exception, not the rule. Its use should be rare and ideally require a clear justification in the commit message or a linked ticket for traceability.
A solid team policy is to have any commit pushed with --no-verify automatically flagged for review in your CI pipeline. This ensures that even bypassed code gets the same level of scrutiny before it can ever be merged into the main branch.
How Are Pre-Commit Hooks Different from CI/CD Pipeline Checks?
This is a crucial distinction. Pre-commit hooks and CI/CD pipeline checks aren't competitors; they're partners in a robust DevSecOps strategy. They just operate at different stages of the development lifecycle to achieve the same goal: higher-quality, more secure code.
Think of it this way: pre-commit hooks are your local, personal trainer, while CI/CD checks are the official tournament referee.
-
Pre-Commit Hooks (The Trainer): These run on a developer's machine before code is even shared with anyone else. They provide instant, private feedback on things like formatting, syntax errors, and simple security mistakes. Their main job is to catch the common stuff quickly, saving developer time and preventing noisy, trivial failures in the main pipeline.
-
CI/CD Pipeline Checks (The Referee): These run on a centralised server after code has been pushed to the repository. They perform much more comprehensive and time-consuming validation, like running full test suites, building the application, performing dynamic security analysis, and deploying to a staging environment. Their job is to be the final, authoritative source of truth on whether a change is ready for production.
When you use both, you create a layered defence. Fast, simple checks happen locally, and the slower, more exhaustive checks happen on the server. This combination creates an efficient workflow that boosts both developer productivity and overall code quality.
At Regulus, we help you build a foundation of compliance from the very first line of code. Our platform turns complex CRA requirements into a clear, actionable roadmap, ensuring your development practices, including automated checks like pre-commit hooks, align perfectly with EU regulations. Gain clarity and confidence in your compliance strategy by exploring our solutions.


