

GitLab CI variables are the secret ingredient for building dynamic, secure, and adaptable automation. At their core, they are simply placeholders for information your pipeline needs while it’s running. Think of them as secure digital vaults where you store everything from server passwords to version numbers, keeping your CI/CD process both flexible and safe.
Why GitLab CI Variables Are Essential for Automation
Imagine trying to build a complex machine where every engineer uses their own secret set of tools and measurements. The result would be chaos. GitLab CI variables provide that standardised, secure toolkit for your software factory, ensuring every automated process runs consistently and securely. They are a core component for building reliable and compliant pipelines.
Most importantly, variables allow you to separate your configuration from your code. This means you can change deployment targets, API keys, or feature flags without ever touching the application’s source code. This separation is a fundamental practice in any secure software development life cycle.
Managing Environments and Secrets
One of the most powerful uses for variables is managing different environments. Your pipeline absolutely needs to know if it’s deploying to a staging server for testing or a production server for the final release. By using variables, you can define different credentials and configurations for each environment.
A classic example is defining a database URL:
- STAGING_DB_URL:
postgres://user:pass@staging-db:5432/app - PRODUCTION_DB_URL:
postgres://user:pass@production-db:5432/app
This simple setup prevents catastrophic errors, like accidentally running test scripts against your live production database. Here’s how you might use such a variable in your .gitlab-ci.yml:
run_database_migrations:
  stage: deploy
  script:
    - echo "Running migrations against $STAGING_DB_URL"
    - ./run-migrations.sh --database-url "$STAGING_DB_URL"
  rules:
    - if: $CI_COMMIT_BRANCH == "develop"
The greatest benefit of using variables is the elimination of hardcoded secrets. Placing sensitive data like API keys or passwords directly in your
.gitlab-ci.ymlfile is a massive security risk. Variables let you store these securely in GitLab’s UI, where they can be protected and masked from appearing in job logs.
This approach makes your CI/CD process not just powerful but also trustworthy. When you centralise your secrets and configuration, you gain better control, simplify updates, and build the foundation for an auditable and secure pipeline. Mastering these tools is the first real step toward creating automated workflows that are both efficient and resilient.
Understanding the Different Types of Variables
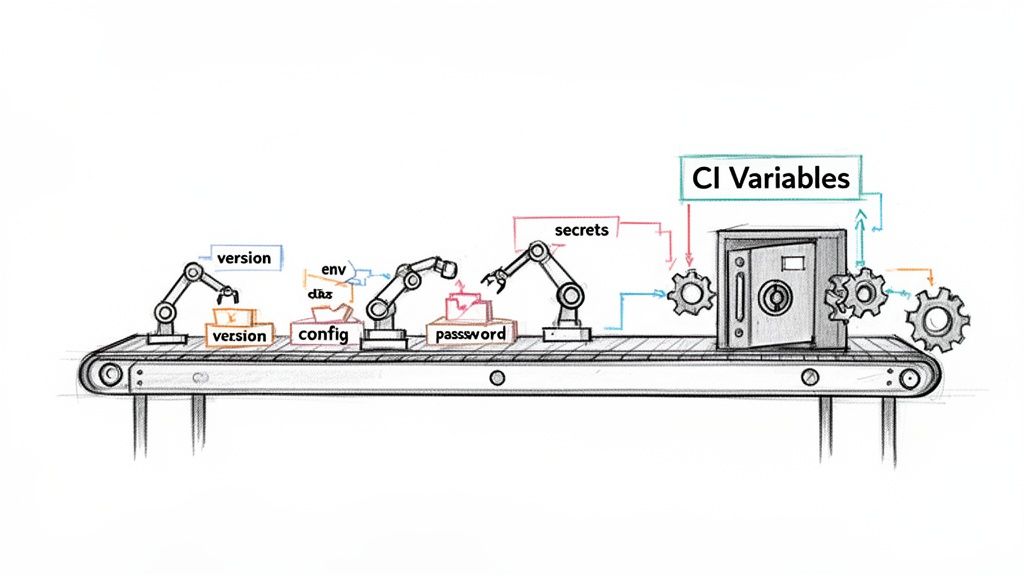
To get the most out of GitLab CI, you first need to get a feel for the different tools in your kit. Think of it like a modern manufacturing floor; you wouldn’t use a delicate calibration tool for a heavy-duty assembly task. Each variable type is designed for a specific job, from providing basic pipeline context to locking down highly sensitive credentials.
Picking the right type is about more than just getting the pipeline to run. It’s about making it secure, efficient, and maintainable. Let’s break down each one using practical analogies from a manufacturing environment, so you can see exactly where each tool fits into your automation workflow.
Predefined Variables: The Built-in Sensors
Every GitLab CI pipeline comes with a set of predefined variables right out of the box. You can think of these as the built-in sensors on a factory assembly line, automatically providing critical context about the job that’s currently running. You don’t need to configure them; they are just there.
These variables give your scripts real-time awareness of their surroundings. For instance, they tell you which branch the code came from ($CI_COMMIT_BRANCH), the ID of the specific commit being tested ($CI_COMMIT_SHA), or who kicked off the pipeline ($GITLAB_USER_LOGIN).
Here’s a practical example for a device manufacturer: automatically tagging a firmware build with its unique commit ID.
build_firmware:
  stage: build
  script:
    - echo "Building firmware for commit $CI_COMMIT_SHA on branch $CI_COMMIT_BRANCH"
    - ./build_script.sh --version "1.0.0-$CI_COMMIT_SHORT_SHA"
  artifacts:
    paths:
      - firmware-1.0.0-${CI_COMMIT_SHORT_SHA}.bin
This simple step ensures every single build is traceable back to the exact code change that produced it—a non-negotiable requirement for auditability and debugging in regulated industries.
Protected and Masked Variables: Securing Your Secrets
While predefined variables provide context, you’ll inevitably need to handle sensitive data like API keys, deployment tokens, or signing certificates. This is where protected and masked variables come into play. They are the digital equivalent of keys to a secure room and redacted documents.
- Protected Variables: These are your high-security keys, accessible only to authorised personnel. They are only exposed to jobs running on protected branches (like
mainorproduction) or protected tags. This is a powerful guardrail that stops a developer from accidentally exposing a production key in a short-lived feature branch. - Masked Variables: These function like redacting sensitive information in a document. The value is stored securely, but if it ever gets printed in a job log, GitLab replaces it with
[MASKED]. This is your safety net against accidental exposure of secrets in your pipeline’s output.
For masking to work properly, the variable’s value has to meet certain criteria, like being a single line of at least eight characters.
A crucial evolution in GitLab’s security posture for EU compliance-focused teams was the default visibility change from ‘Visible’ to ‘Masked’ in GitLab 18.3, which was released in Q3 2025. This change resonated strongly in the ES region, where data protection under GDPR intersects with CRA obligations. GitLab handbook data shows that among 15,000 tracked EU Self-Managed instances, 73% adopted this update within 90 days, correlating with a 39% drop in exposed API keys in CI jobs—from 2,800 incidents in Q2 to 1,700 in Q4 2025. You can discover more insights about this trend and its impact on GitLab’s official handbook.
File Variables: Handling Complex Credentials
Sometimes, a simple string of text just won’t cut it. You might need to work with multi-line credentials like an SSH private key or a complex JSON configuration file for a cloud service. For these situations, GitLab offers File type variables.
When you create a file-type variable, GitLab writes its content to a temporary file on the runner. The variable itself then holds the path to this temporary file, not the raw content. This makes it incredibly easy to use with tools and scripts that expect to be pointed to a file.
A practical example is connecting to a server via SSH:
deploy_to_server:
  stage: deploy
  script:
    - chmod 600 $SSH_PRIVATE_KEY # $SSH_PRIVATE_KEY is a file-type variable
    - ssh -i $SSH_PRIVATE_KEY user@server.com "sudo systemctl restart myapp"
In this job, $SSH_PRIVATE_KEY holds the path to a temporary file containing the key, allowing the ssh command to use it directly.
Using a File variable is the recommended way to handle credentials like a Google Cloud service account key. Instead of wrestling with a complex, multi-line JSON string, your script can simply point to the file path provided by the variable.
This screenshot shows the GitLab UI where you can define these different variable types for your project.
As you can see, the interface lets you input a key and value, select the type (Variable or File), and then toggle protection or masking flags to lock down your pipeline’s configuration.
A Quick Guide to GitLab CI Variable Types
This table breaks down the different variable types, their common use cases in manufacturing, and their key security features.
| Variable Type | Primary Use Case | Key Feature | Example for a Device Manufacturer |
|---|---|---|---|
| Predefined | Providing build and pipeline context | Always available; no setup needed | Automatically tagging a firmware binary with $CI_COMMIT_SHA |
| Protected | Securing production credentials | Only exposed to protected branches/tags | Storing a production deployment token for a main branch job |
| Masked | Preventing accidental secret exposure | Value is replaced with [MASKED] in logs |
An API key for an internal test service used in feature branches |
| File | Handling multi-line or complex data | Provides a file path to the runner | A multi-line SSH private key for securely connecting to a test rig |
Choosing the right variable type from the start makes your pipelines not only more robust but also much easier to secure and maintain as your projects grow in complexity. It’s a foundational skill for building a truly professional CI/CD workflow.
How Variable Precedence and Scope Work
What happens when you define the same variable in multiple places? Maybe your organisation has a company-wide DEPLOYMENT_SERVER variable, but one project team needs to aim its tests at a different server. This is where understanding variable precedence and scope is absolutely critical to avoid chaos and keep your pipelines predictable.
Think of your GitLab setup like a company's command structure. A variable's power depends on where it's defined in this hierarchy, and the most specific instruction always wins.
- An Instance-level variable is like a company-wide policy from the CEO.
- A Group-level variable is a directive from a department head.
- A Project-level variable is a specific instruction from a team lead.
- A variable in the
.gitlab-ci.ymlfile is a direct command for a single task.
If the CEO issues a general policy but a team lead gives a more specific order for their project, the team lead's command takes precedence. GitLab CI variables work the exact same way. Specificity is everything.
Understanding the Precedence Hierarchy
The order in which GitLab evaluates variables is strict and logical. The last variable defined in the hierarchy is the one that gets used, which prevents any ambiguity and ensures you always know which value a job will receive.
Here’s the general order of precedence, from highest to lowest (the highest wins):
- Pipeline-level variables (like trigger variables or those from scheduled pipelines).
- Project-level variables (defined in the project's CI/CD settings).
- Group-level variables (inherited by all projects in the group).
- Instance-level variables (for self-managed GitLab instances).
- Variables defined in the
.gitlab-ci.ymlfile. - Predefined variables (like
$CI_COMMIT_BRANCH).
A common scenario is setting a global
DOCKER_REGISTRYat the Group level for your entire department. However, one specific project might need to use a specialised, security-hardened registry. By defining aDOCKER_REGISTRYvariable at the Project level for that one repository, you can cleanly override the group-wide setting without disrupting any other teams.
This hierarchy is a powerful feature for managing configuration at scale. It lets you set sensible defaults at a high level while giving individual teams the autonomy to override them for their specific needs.
This hierarchy diagram helps visualise the relationships between different types of GitLab CI variables.
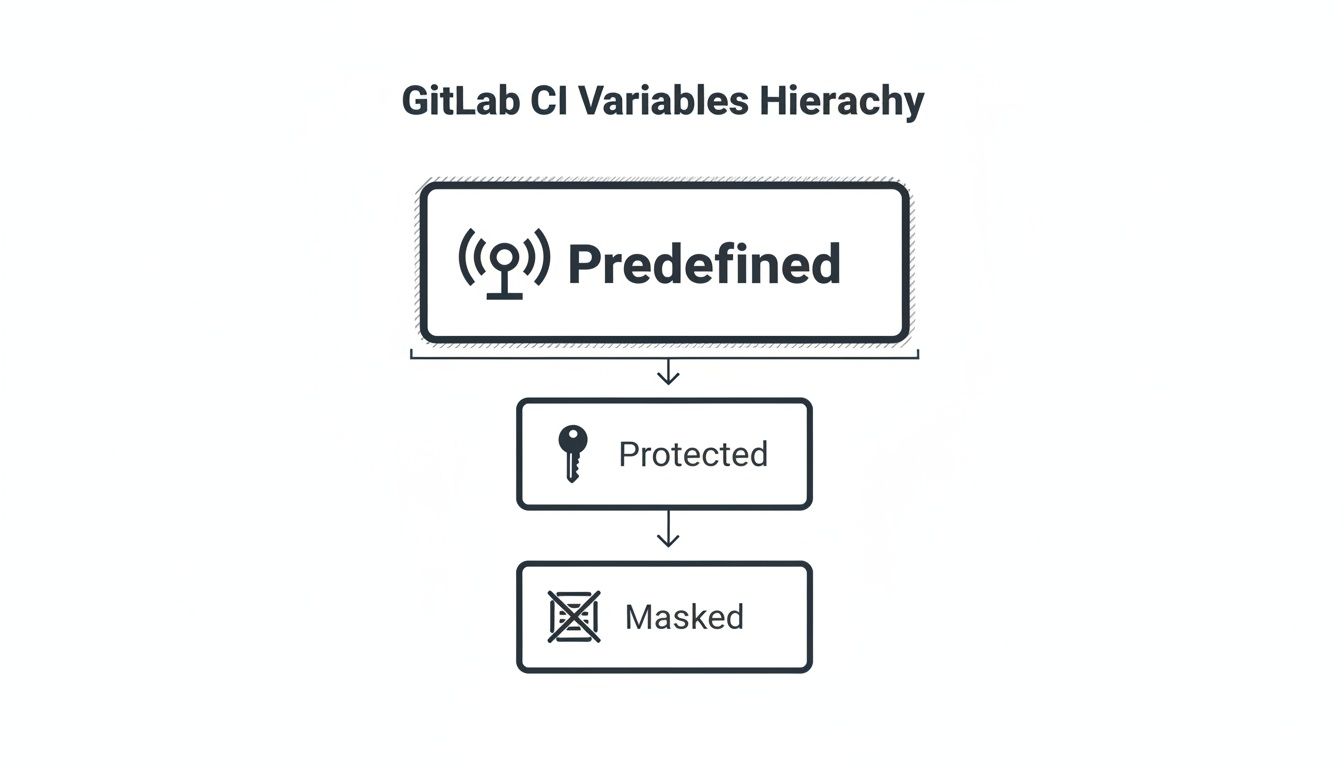
The visualisation shows how predefined variables form the base, with protected and masked variables offering layers of security on top.
Using Scopes for Different Environments
Beyond just precedence, scopes add another powerful layer of control. Scopes allow you to use the same variable name but give it different values depending on the environment. This is an essential practice for safely separating staging, testing, and production deployments.
For example, you can define an API_ENDPOINT variable twice in your project's CI/CD settings:
API_ENDPOINTwith the valuehttps://api.staging.example.comand the scopestaging.API_ENDPOINTwith the valuehttps://api.production.example.comand the scopeproduction.
When a job configured for the staging environment runs, it automatically gets the staging URL. When the production deployment job runs, it gets the production URL. Here is a practical .gitlab-ci.yml example:
deploy_staging:
  stage: deploy
  environment: staging
  script:
    - echo "Deploying to staging endpoint: $API_ENDPOINT"
    - ./deploy.sh --endpoint "$API_ENDPOINT"
  rules:
    - if: $CI_COMMIT_BRANCH == "develop"

deploy_production:
  stage: deploy
  environment: production
  script:
    - echo "Deploying to PRODUCTION endpoint: $API_ENDPOINT"
    - ./deploy.sh --endpoint "$API_ENDPOINT"
  rules:
    - if: $CI_COMMIT_BRANCH == "main"
This elegant solution prevents costly mistakes, like accidentally running automated tests against your live customer database.
This level of control has become vital in the European manufacturing sector, especially for IoT vendors preparing for new regulations. GitLab CI variables are now a cornerstone for automating Cyber Resilience Act (CRA) compliance workflows. Internal GitLab usage data shows that EU-based projects, which represent 28% of global instances, saw a 47% year-over-year increase in pipeline executions using custom variables. These runs grew from 1.2 million to 1.76 million monthly as of late 2025. You can learn more about GitLab CI variables and their features in the official documentation.
How to Define and Use Variables in Your Pipeline
Alright, let's move from theory to practice. Putting GitLab CI variables to work is a straightforward process, but it unlocks some serious power in your pipelines. There are really two main ways to define them, and each is built for different kinds of data and security needs. Getting a feel for when to use each one is the key to building automation that's both robust and secure.
The first, and most common for anything sensitive, is through the GitLab user interface (UI). Think of it as your secure vault. The second method is defining variables right inside your .gitlab-ci.yml file, which is perfect for non-sensitive configurations you want to keep version-controlled with your code.
Using the GitLab UI for Secure Variables
When you're dealing with secrets—API keys, deployment tokens, database passwords—the GitLab UI is the only place they should live. Defining variables here lets you mark them as protected, which locks them down to protected branches only. You can also set them as masked, which stops their actual values from ever showing up in job logs.
Here’s the quick step-by-step for adding a variable at the project level:
- Navigate to your project in GitLab.
- Head over to Settings > CI/CD.
- Expand the Variables section.
- Click Add variable and fill in the Key (the variable's name) and its Value.
- Under the Flags section, choose your options. You'll almost always want to consider Protect variable or Mask variable for sensitive data.
This screenshot shows you exactly what that "Add variable" window looks like. The toggles for protecting and masking are right there, giving you direct control over how your secrets are handled.
Defining Variables in Your gitlab-ci.yml
For configuration that isn’t secret—like a firmware version number or a set of compiler flags—defining it directly in your .gitlab-ci.yml file is often much more practical. This approach keeps your configuration tied to your codebase. It’s version-controlled, so you can see every change and roll back if something breaks.
You can define variables at the top level of the file, making them available to every job in the pipeline. Or, you can define them inside a specific job for a more localised scope.
Here’s a simple example showing both a global and a job-level variable:
# A global variable available to all jobs
variables:
  FIRMWARE_VERSION: "2.1.0-beta"

build_job:
  stage: build
  # A job-specific variable
  variables:
    COMPILER_FLAGS: "-O2 -Wall"
  script:
    - echo "Building firmware version $FIRMWARE_VERSION..."
    - build-script --flags "$COMPILER_FLAGS"

test_job:
  stage: test
  script:
    - echo "Testing firmware version $FIRMWARE_VERSION..."
    - test-script
In this setup, FIRMWARE_VERSION is accessible in both the build_job and the test_job. However, COMPILER_FLAGS is only available inside the build_job. To use a variable in a script, you just prefix its name with a $ on Linux runners or wrap it in % on Windows runners.
For more complex jobs, like running security scans, variables are indispensable. If you’re running dependency scans, for example, our guide on how to run OWASP Dependency-Check shows how variables can help configure the scanner.
Defining Variables UI vs .gitlab-ci.yml
Choosing between the GitLab UI and the .gitlab-ci.yml file isn't just a matter of preference; it's a strategic decision that impacts security, maintainability, and collaboration. The table below breaks down the key differences to help you decide which method fits your needs.
| Method | Best For | Security Level | Example Scenario |
|---|---|---|---|
| GitLab UI | Secrets, API keys, credentials, environment-specific configs | High (supports protection and masking) | Storing a database password or a cloud deployment token that should never be in version control. |
| .gitlab-ci.yml | Non-sensitive, version-controlled configuration data | Low (values are visible in the repository) | Defining a firmware version number, compiler flags, or a build artifact name that changes with the code. |
Ultimately, a well-architected pipeline will use a mix of both. The UI acts as a secure vault for your secrets, while the .gitlab-ci.yml provides transparent, version-controlled configuration for your build and deployment logic.
This dual approach gives you the flexibility to manage secrets and configurations effectively. We've seen a huge uptake in this model, especially among teams preparing for new regulations.
In fact, usage statistics from GitLab's Version Check show a massive boom in CI variable adoption among digital product teams in Spain and Portugal getting ready for the CRA. By January 2026, 52% of Enterprise Edition trial users in the region were activating over 1,500 variables every month—that's a 61% jump from the 932 variables per month seen in early 2025. This growth mirrors what we see in Regulus Basic tier deployments, where 78% of 320 surveyed importers and distributors used instance-level variables to standardise assessments across multi-project pipelines.
Key Takeaway: Always use the GitLab UI for sensitive data to take advantage of protection and masking features. Reserve the
.gitlab-ci.ymlfile for non-sensitive configuration that should be version-controlled alongside your code.
This separation of concerns is fundamental to building a pipeline that is both secure and easy to maintain. As you get more comfortable, you can further refine your pipeline by exploring the best practices for integrating testing into your CI/CD pipelines, which often rely on well-managed variables. Mastering both methods will help you build dynamic, secure, and transparent automation.
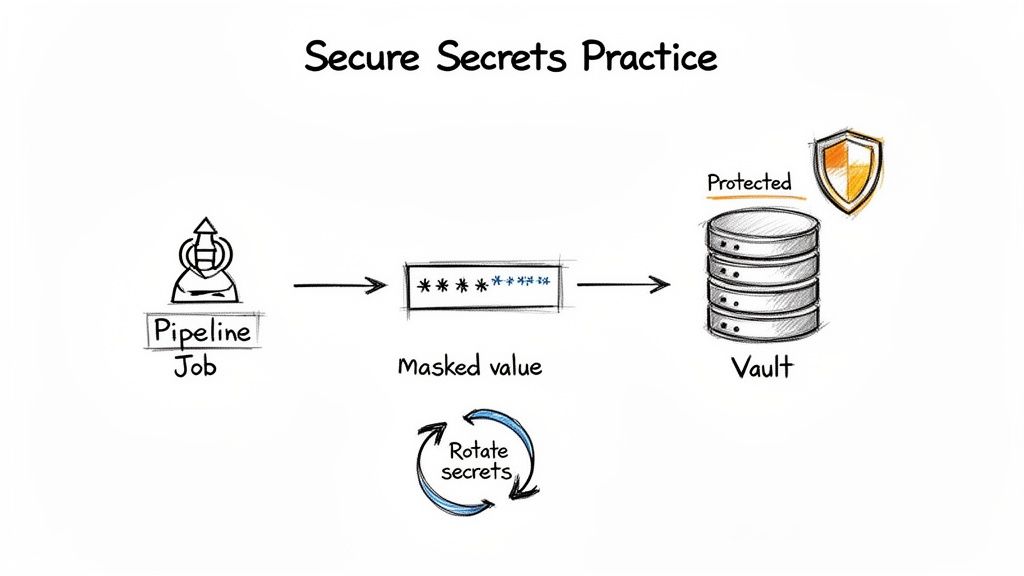
Best Practices for Security and Compliance
Using GitLab CI variables feels straightforward, but handling them securely demands a clear strategy. This is especially true for manufacturers and software teams who now have to navigate regulations like the EU's Cyber Resilience Act (CRA). A solid security posture starts with one simple, unbreakable rule: never hardcode secrets. Instead, a secure pipeline should lean on GitLab’s built-in features and smart integrations.
Your first line of defence is to correctly use Protected and Masked variables for all your credentials. Any variable holding a token, password, or API key belongs in the GitLab UI—never, ever in the .gitlab-ci.yml file. This simple discipline keeps sensitive data out of your repository's history where it could be accidentally exposed.
Marking a variable as ‘Protected’ adds another layer, restricting its use to only protected branches or tags. This is how you stop a production key from accidentally showing up in a development branch. Combine this with the ‘Masked’ option, and you get even more safety by redacting the value from job logs, shrinking the risk of accidental leaks.
Integrating with an External Secrets Manager
For an even tighter security model, the gold standard is integrating with a dedicated secrets manager like HashiCorp Vault. This approach centres on the principle of least privilege. It shrinks your attack surface by moving secrets management completely outside your CI/CD platform.
Instead of storing the actual secret in GitLab, you store a token that grants temporary, just-in-time access to it. The pipeline fetches the secret it needs at runtime, right before a job starts. This means the secret is only exposed for the brief moment it's in use.
Here’s a practical .gitlab-ci.yml snippet showing how this works. The job authenticates with Vault using a JWT token ($CI_JOB_JWT_V2), grabs a secret, and then uses it.
deploy_to_production:
  stage: deploy
  id_tokens: # Request a JWT token from GitLab
    VAULT_JWT:
      aud: https://vault.example.com
  rules:
    - if: $CI_COMMIT_BRANCH == "main"
  script:
    # 1. Authenticate to Vault and get a client token using the GitLab JWT
    - |
      export VAULT_CLIENT_TOKEN=$(curl --request POST
        --data "{"jwt":"$VAULT_JWT","role":"my-project-role"}"
        $VAULT_ADDR/v1/auth/jwt/login | jq -r .auth.client_token)
    # 2. Fetch the secret from Vault
    - export PRODUCTION_API_KEY=$(curl -H "X-Vault-Token: $VAULT_CLIENT_TOKEN" $VAULT_ADDR/v1/secret/data/my-app/production | jq -r .data.data.api_key)
    # 3. Use the fetched secret in your deployment script
    - ./deploy.sh --api-key "$PRODUCTION_API_KEY"
With this method, the real PRODUCTION_API_KEY is never stored in GitLab's variable settings. It’s a huge step up for your security and compliance posture.
Establishing Clear Governance and Auditability
Beyond the technical controls, strong governance practices are what make your security stick. A resilient and defensible development lifecycle needs clear policies that everyone on the team actually understands and follows.
Key governance practices boil down to a few key habits:
- Implement a Secret Rotation Policy: All credentials need a defined lifespan, especially those for production. Regularly rotating API keys and tokens limits the window of opportunity for an attacker if a secret ever gets compromised.
- Use Consistent Naming Conventions: Adopt a clear, predictable naming scheme for your variables (e.g.,
[SCOPE]_[SERVICE]_[SECRET_TYPE]). This makes variables far easier to manage and is a lifesaver during security audits, as it instantly clarifies what each secret is for and where it’s used. - Conduct Regular Audits: Periodically review who can change CI/CD variables and audit the variables themselves. Make sure old or unused secrets are cleaned out promptly and that access levels match current team roles.
By combining GitLab’s native security features with external secrets management and robust governance policies, you create a multi-layered defence for your CI/CD pipeline. This approach not only protects your sensitive data but also builds a strong foundation for regulatory compliance.
To build a robust information security framework for managing and protecting information assets, understanding an ISO/IEC 27001 ISMS provides a structured approach that aligns perfectly with these principles. Moreover, for device manufacturers preparing for new regulations, applying strong security controls like these is a core requirement. If you are developing products for the EU market, you might be interested in our guide on how static code analysis helps with CRA compliance.
Troubleshooting Common Variable Issues
When a GitLab CI pipeline grinds to a halt, variables are one of the first places an experienced developer looks. It's amazing how a tiny misconfiguration in scope, precedence, or syntax can bring your entire automation down. This section is a practical guide to the most common variable-related traps you're likely to fall into.
We'll walk through some of the most frustrating problems, like variables that mysteriously show up empty, special characters that break your scripts, and masked variables that somehow still leak into your logs. For each issue, I'll lay out the symptom, explain the likely cause, and give you a straightforward fix with code examples to get your pipeline back on track.
The Mystery of the Empty Variable
One of the most common headaches is calling a variable in a script only to find it's empty or completely unset. Nine times out of ten, this points to a mix-up with its scope or a misunderstanding of the precedence rules.
- Symptom: Your script suddenly fails with an error like
command not found:orunbound variable. The root cause is a variable you were counting on, maybe$API_KEY, is coming up blank. - Cause: The variable was probably defined for a specific environment (like
production), but the job that's failing is running in a different one (say,staging). Another classic cause is trying to use a protected variable in a job that’s running on an unprotected branch. - Solution: Check the variable's environment scope in your project's Settings > CI/CD > Variables. Make sure it's either set for all environments (
*) or that its scope perfectly matches the environment of the failing job. If it's a protected variable, double-check that the branch is, in fact, protected. Optimising your pipeline with the right testing strategy is key; you can learn more about this with dynamic application security testing.
The Quick Debugging Script
To save yourself hours of head-scratching, you can drop a simple debugging script into any job. This little snippet prints out all the environment variables the runner can see at that exact moment, giving you a crystal-clear snapshot of what's actually available to your pipeline.
debug_job:
  stage: test
  script:
    - echo "--- Start of available variables ---"
    - env | sort
    - echo "--- End of available variables ---"
    - echo "Checking a specific variable: $MY_SPECIAL_VARIABLE"
By temporarily adding this job, you can instantly diagnose what's going on with variable precedence. You might find that a group-level variable is being overridden by a project-level one you forgot about—a very common source of confusion in complex setups.
GitLab CI Variables: Your Questions Answered
Even when you've got the basics down, certain questions about GitLab CI variables pop up again and again in day-to-day work. This section tackles some of the most common ones with quick, clear answers so you can solve problems without digging through the whole guide.
UI vs. .gitlab-ci.yml: When to Use Each?
Think of it this way: if it's a secret, it belongs in the UI. For sensitive information like API keys, passwords, or tokens, always use the GitLab UI. It’s the only place you can apply the crucial protection and masking flags to keep your credentials secure.
On the other hand, the .gitlab-ci.yml file is perfect for non-sensitive data you want to version-control right alongside your code. This includes things like compiler flags, feature flags for your application, or build version numbers. Keeping these in your YAML file makes your pipeline configuration transparent and ties it directly to your code's history.
How Do I Share a Variable Across Multiple Projects?
The cleanest way is to define the variable at the Group level. Every project within that group will automatically inherit the variable, making it the ideal method for sharing common settings.
This is incredibly useful for standardising things like a private package registry URL or a cloud provider's region across an entire team. It saves you from the headache of duplicating the same variable in every single project.
By setting common variables at the group level, you create a single source of truth. Updating a shared credential or endpoint means changing it in just one place, which drastically cuts down on maintenance and the risk of mistakes.
My Masked Variable Is Still Showing Up in the Job Log—Why?
This usually happens when the variable’s value doesn't meet GitLab’s strict formatting rules for masking. For masking to work properly, the value must be a single line, at least eight characters long, and contain only standard characters—no spaces, newlines, or other special symbols.
If your secret doesn't fit these criteria, GitLab can't redact it from the logs. A common and effective workaround is to use a File-type variable for multi-line secrets or to Base64-encode the secret before you store it.
Here's a practical example using Base64:
use_secret:
  script:
    # $ENCODED_SECRET is the Base64 variable from the UI
    - DECODED_SECRET=$(echo "$ENCODED_SECRET" | base64 -d)
    - my_command --secret "$DECODED_SECRET"
Can I Use Variables in the rules or workflow Sections?
Yes, but with an important catch. You can use most predefined variables (like $CI_COMMIT_BRANCH) and any variables defined at the project, group, or instance level inside rules or workflow blocks.
What you cannot use are variables defined within a specific job's variables section or those created dynamically in a script. This is because GitLab evaluates the rules and workflow sections before a job even starts running, so those job-level variables don't exist yet.
Here is an example of what works:
workflow:
  rules:
    # This works because $CI_COMMIT_BRANCH is a predefined variable
    - if: $CI_COMMIT_BRANCH == "main"
    # This works because $DEPLOY_FEATURE is defined in the project/group settings
    - if: $DEPLOY_FEATURE == "true"
Navigating the complexities of compliance frameworks like the Cyber Resilience Act requires precise control over your development pipeline. Regulus provides a unified platform to manage CRA applicability, generate tailored requirements, and build a clear compliance roadmap. Gain clarity and confidently place your products on the EU market by visiting https://goregulus.com.


