

Connecting GitLab to Jira does more than just link two tools; it creates a single, unified workflow between your code repository and your project management hub. When you set this up, actions like code commits, creating branches, and opening merge requests can automatically update the right Jira issues. For instance, a developer can push a commit with the message git commit -m "Fix login bug. Resolves PROJ-123" and the corresponding Jira ticket PROJ-123 will automatically be updated with the commit details and can even be moved to the ‘Done’ column. This gives everyone real-time visibility into development progress right where they track tasks, cutting out the need for manual status updates and bridging the gap between technical and non-technical teams.
Why a GitLab Jira Integration Matters
Hooking GitLab up with Jira isn’t just a technical convenience—it’s a strategic move to establish a single source of truth. It closes the classic divide between developers living in GitLab and the project managers, security officers, or compliance teams who live in Jira. This synergy is especially critical for organisations dealing with complex regulations like the EU’s Cyber Resilience Act (CRA).
For manufacturers of IoT devices or other digital products, proving compliance means having a clear, auditable trail from a reported vulnerability all the way to its fix in the code. A solid integration delivers exactly that. Picture a security flaw being flagged by a GitLab scan: it can instantly generate a Jira ticket like SEC-451: Critical SQL Injection Vulnerability. From there, every single commit made to fix it, like fix(auth): Sanitize user input to prevent SQLi. Closes SEC-451, is linked back, creating a transparent record that stands up to an auditor’s scrutiny. This is a world away from inefficient context-switching and siloed information.
To help you get the most out of this integration, we’ve put together a quick look at the main advantages you can expect.
| Benefit | Impact on Development Teams | Impact on Compliance and Management |
|---|---|---|
| Unified Workflow | Eliminates manual updates; developers stay in GitLab while still providing status updates. | Project managers get real-time progress reports directly in Jira without interrupting engineers. |
| Full Traceability | Code changes are automatically linked to specific Jira issues, providing context for every commit. | Creates a clear, auditable trail from issue identification to resolution, essential for CRA compliance. |
| Increased Efficiency | Reduces context switching between tools, allowing for deeper focus on coding tasks. | Streamlines vulnerability management and reporting workflows, ensuring nothing falls through the cracks. |
| Enhanced Collaboration | Fosters better communication between technical and non-technical teams with a shared view of progress. | Provides management with a high-level view of security and development velocity from a single dashboard. |
This table shows how a well-configured integration doesn't just make life easier for developers; it provides the crucial visibility and control needed for effective project management and regulatory compliance.
Bridging the Development and Compliance Gap
The real power here is in making raw development activities visible and actionable within a project management framework. A big part of harmonising these two worlds is creating a shared understanding of how issues move from discovery to resolution. A deep dive into the software bug life cycle can offer a solid foundation for defining these workflows.
With a proper connection, you can enable things like:
- Automated Status Updates: A developer merging a feature branch can automatically shift the linked Jira ticket from 'In Progress' to 'In Review'. No manual dragging required.
- Direct CI/CD Visibility: Project managers can see pipeline statuses (pass or fail) for related code changes without ever leaving the Jira issue.
- Traceable Vulnerability Management: A GitLab SAST scan finding a critical vulnerability can automatically create a Jira ticket with the label
security-debtand assign it to the security champion on the relevant team. You can learn more about how this supports a secure software development life cycle.
This integration transforms abstract project tasks into tangible development actions. It creates an unbroken chain of evidence, which is no longer a 'nice-to-have' but a core requirement for placing secure and compliant products on the European market.
This growing need for unified tracking is clearly reflected in market trends. In the European manufacturing sector, GitLab-Jira integration has seen explosive adoption since 2022, a surge driven by data residency expansions tailored to EU regulations. By Q3 FY2026, GitLab reported a 45% increase in EU-based seats for integrated Jira workflows among manufacturers. This highlights just how critical unified vulnerability tracking—a cornerstone of CRA compliance—has become.
Laying the Groundwork for a Seamless Integration
Before you even think about connecting GitLab and Jira, a little prep work can save you a world of pain later on. A solid integration is built on a few foundational pieces, from having the right permissions to picking the correct authentication method. I've seen too many teams skip these steps only to get stuck in frustrating troubleshooting loops.
First things first, check your permissions. To get this integration off the ground, you absolutely need Maintainer or Owner permissions in your GitLab project and administrator permissions in Jira. For example, if you can't see the 'Settings > Integrations' menu in your GitLab project, you don't have the right access. If you don't have these permissions, you simply won't be able to access the settings menus or authorise the connection. It's a hard stop.
Choosing Your Authentication Method
Once your permissions are sorted, you need to decide how GitLab will talk to Jira. You have two main options: OAuth and Personal Access Tokens (PATs). They each have their place, and the right choice really depends on your team's security needs and how you work.
- OAuth (Recommended for Teams): This is the more secure and robust choice for any team environment. It creates an authorised application link between GitLab and Jira without ever exposing user credentials. A huge benefit is that actions performed by the integration are tied back to the user who authorised it, which gives you a much clearer audit trail.
- Personal Access Tokens (PATs): A PAT is a simpler way to get going, acting like a password tied to a specific user's account. While it's easier to set up, every single action the integration takes will be attributed to the one user who generated the token. This might be fine for a personal project or a specific automation script, but it’s a poor fit for a team where you need to know who did what.
For most organisations, especially those needing clear traceability for compliance, OAuth is the superior choice. It avoids tying the entire integration to a single person's account, which can become a real headache if that person changes roles or leaves the company.
Essential Setup for Jira Cloud and Self-Managed Instances
What you do next depends entirely on where your Jira instance lives. The setup for Jira Cloud is quite different from a self-managed (Data Center or Server) instance.
If your team is on Jira Cloud, the process is pretty straightforward. You'll need to install the GitLab for Jira Cloud app from the Atlassian Marketplace. This free app handles a lot of the heavy lifting for you, making the connection much simpler and enabling handy features like seeing CI/CD pipeline status directly inside a Jira issue. Honestly, it's a must-have for a smooth cloud integration.
Running a self-managed GitLab instance that connects to Jira? You get more control, but that also means more responsibility. Your biggest task is ensuring your network is configured to allow traffic between your GitLab and Jira servers. This often involves a chat with your network team to open up firewall rules on the necessary ports. A classic mistake is overlooking this, which leads to connection timeouts and cryptic error messages. Getting your network settings right is absolutely critical for a stable connection.
Nailing these prerequisites is fundamental to building a reliable bridge between your development work and project management. Taking the time to get these initial steps right ensures your GitLab-Jira integration is built on solid ground, ready for more advanced automation and compliance workflows down the line.
Configuring the Basic Integration in GitLab
With the groundwork in place, you’re ready to configure the heart of the GitLab-Jira integration. This is where you connect a specific GitLab project to its corresponding Jira project, unlocking a flow of information that cuts down on manual work and gives everyone much-needed visibility. Let's walk through the settings and bring the connection to life.
Your first stop is inside your GitLab project. Navigate to Settings > Integrations and find the Jira option. This is your central control panel for defining how the two platforms will talk to each other. You'll see fields for your Jira URL and the authentication details (username/password or OAuth) you prepared earlier.
Getting this right is the first critical step. For instance, if your Jira instance is at https://yourcompany.atlassian.net, that entire URL goes into the Web URL field. For authentication, just plug in the credentials you decided on—whether it's a dedicated service account or an OAuth authorisation.
Activating the Integration
Once your details are in, you need to tick the Active checkbox and decide when the integration should fire. The two main triggers are:
- Commit: Creates a link and a comment in the Jira issue every time a commit message references the issue key.
- Merge request: Triggers when a merge request title or description mentions a Jira issue key.
For most teams, activating both triggers gives the most complete picture of development activity. After filling in the fields and selecting your triggers, hit Test settings and save changes. A green success message is what you're looking for; it confirms GitLab can successfully ping your Jira instance.
A common pitfall here is a simple typo in the URL or using credentials for a user who doesn't have the right permissions in Jira. If the test fails, double-check these details first. The user account needs browse access to the Jira projects you intend to link.
Mastering Smart Commits for Automation
The real magic happens with Smart Commits. This feature lets you do more than just reference Jira issues—you can perform actions on them, like adding comments or transitioning their status, directly from your commit messages or branch names.
To use Smart Commits, you just need to reference a Jira issue key (like PROJ-123) followed by a command. This simple syntax turns a standard commit message into a powerful automation trigger. For example, a developer finishing a quick bug fix could write a commit message like this:
git commit -m "Fix login button alignment issue. Resolves PROJ-123"
This message accomplishes two things at once: it describes the code change, and thanks to the Smart Commit, it automatically adds a comment to the Jira issue PROJ-123 with all the commit details.
You can take this even further by changing the issue's status. Imagine a developer has wrapped up work on a feature and it’s ready for review.
git commit -m "FEAT: Implement new user dashboard. PROJ-451 #in-review"
This command doesn't just comment on PROJ-451—it also moves the ticket to the 'In Review' column on your Jira board. The developer keeps the whole team updated without ever leaving their command line.
A Cheat Sheet for Smart Commit Commands
To help your team get started, here’s a practical cheat sheet of common Smart Commit commands along with some real-world examples.
| Action in Jira | Smart Commit Command | Example Commit Message |
|---|---|---|
| Add a Comment | <ISSUE_KEY> #comment <comment text> |
PROJ-789 #comment API endpoint now returns user data. |
| Log Time | <ISSUE_KEY> #time <value>w <value>d <value>h <value>m |
PROJ-789 #time 2d 4h Logged time spent on backend work. |
| Transition Status | <ISSUE_KEY> #<transition-name> |
PROJ-451 #done Fixes the data validation bug. |
| Close an Issue | <ISSUE_KEY> #close |
PROJ-123 #close Deprecating this old feature. |
Using these commands consistently builds an incredibly rich, automated audit trail. For organisations focused on compliance, such as meeting Cyber Resilience Act (CRA) requirements, this is invaluable. Every piece of work is automatically documented and linked back to your system of record. Adopting a clear branch naming convention, like feature/PROJ-555-user-profile-page, further cements this traceability from the moment work begins.
Automating Your Workflow for Better Visibility
Once you have the basic connection sorted, the real magic happens with automation. This is where you graduate from simply linking issues to building a workflow that actively saves your team time, cuts down on mistakes, and gives everyone incredible visibility into what’s actually happening. True automation gets rid of the manual busywork that kills productivity.
This means setting up webhooks to create genuine two-way sync. For example, an action in GitLab, like a merge request getting approved, can instantly trigger a status update on the corresponding Jira issue. This keeps both platforms perfectly aligned with the real-time state of your projects, without anyone having to remember to manually update a ticket.
This flow chart nails the concept—it shows the simple, automated journey from a developer's local machine right through to a project manager's Jira board.
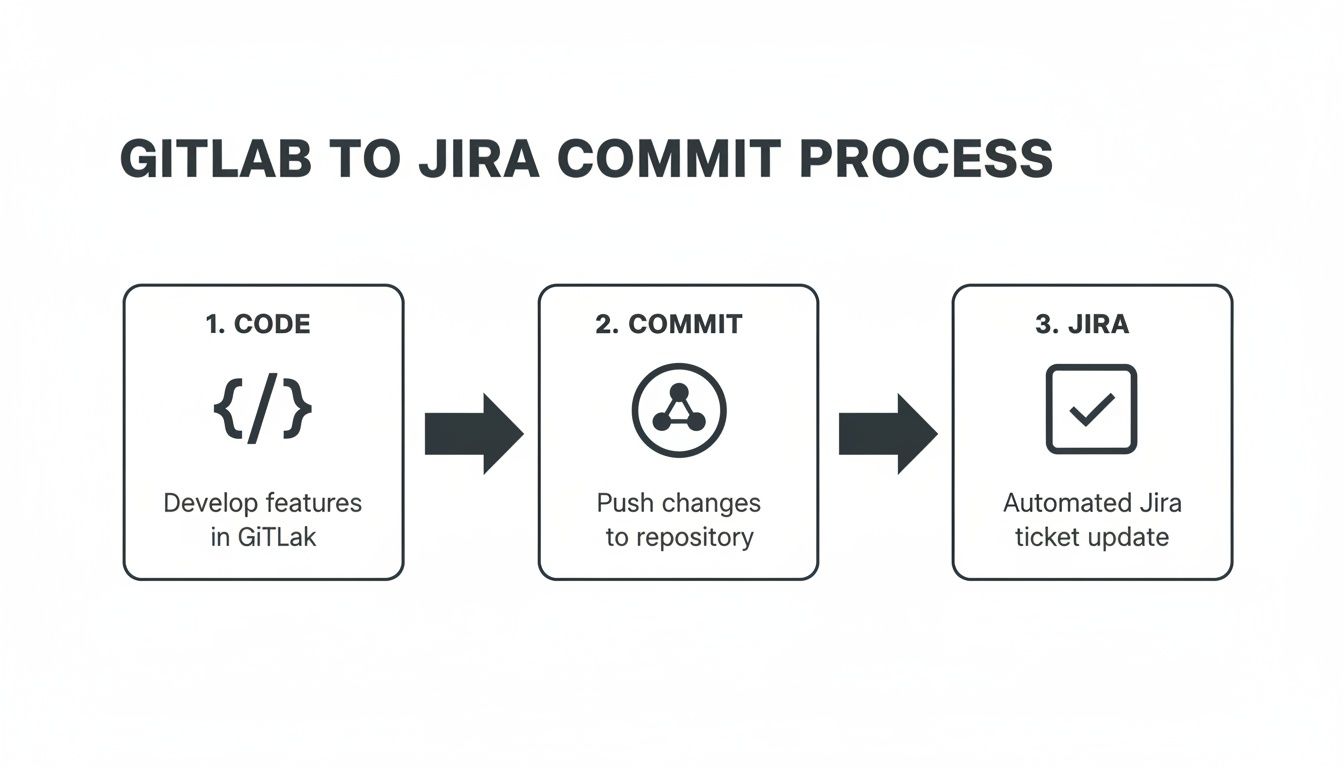
The key takeaway here is how a single developer action—one commit—can set off a chain reaction of updates. This ensures your project tracking tools always reflect the reality of what’s happening in the codebase.
Bring CI/CD Pipelines into Jira
One of the most powerful features is displaying CI/CD pipeline details directly in Jira’s development panel. This gives project managers and other stakeholders a live, transparent view of build, test, and deployment stages without ever having to leave their dashboard.
Imagine a project manager tracking a critical feature release. Instead of pinging a developer for a status update, they can just open the Jira ticket and see everything:
- The latest build has passed.
- All automated tests are complete and successful.
- The feature is now live on the staging environment.
This direct line of sight gives non-technical team members the information they need, exactly when they need it. It builds trust and cuts down on interruptions, letting developers stay focused. For organisations navigating compliance, this also creates a clean, easily accessible audit trail for every stage of development. To see how this fits into your security posture, you might also want to explore guides on static code analysis.
Building Powerful Jira Automation Rules
Beyond just visibility, you can build powerful automation rules in Jira that listen for events happening in GitLab. This is where you can truly mould the integration to fit your team's specific process. The idea is simple: when this happens in GitLab, Jira automatically does that.
Let’s walk through a real-world example. A developer merges a feature branch into the main development branch in GitLab. You can set up a Jira automation rule that spots this merge event and immediately assigns the related Jira ticket to a specific QA engineer for testing.
This kind of automation enforces consistency. It guarantees no task gets dropped and that handoffs between development and QA are instant and smooth, massively cutting down the time a ticket might otherwise sit idle.
Another great rule is to automatically add a label like ready-for-release to a Jira issue once its associated merge request is approved and the CI/CD pipeline runs successfully. These automations aren't just for convenience; they create the kind of precise, traceable audit logs that are vital for meeting CRA compliance demands.
Historical data from ES highlights how crucial the GitLab-Jira integration is for scaling DevOps in sectors hit by the CRA. After Atlassian's 2022 push for European data residency, there was a 60% spike in integrations among Italian and Spanish firmware teams by 2024. GitLab's Q3 FY2026 data also shows that over 50,000 ES projects enabled Jira issues integration, which helped slash planning-to-execution gaps by an incredible 72% for engineering teams.
Practical Examples of Automation Rules
To get you started, here are a few automation ideas your team can put into practice right away:
- Reopen Ticket on Failed Pipeline: If a CI/CD pipeline linked to a merge request fails, have Jira automatically switch the issue back to 'In Progress' and assign it to the developer who made the last commit.
- Notify Stakeholders on Deployment: When a feature is successfully deployed to production (a GitLab event), automatically post a comment on the Jira issue tagging the product manager and other key stakeholders. For example:
@ProductManager @DesignLead - Feature for PROJ-888 has been successfully deployed to production. - Prioritise Security Issues: If a merge request gets a 'security' label in GitLab, a Jira rule can instantly raise the priority of the linked issue to 'Highest' and ping the security team.
These examples show how you can turn this integration from a simple data feed into an active, intelligent part of your workflow. To get even deeper into setting up these kinds of processes, you’ll find a comprehensive guide on how to integrate with Jira and automate your workflow really helpful. By thoughtfully applying these techniques, you’ll build a more efficient, transparent, and compliant development machine.
Streamlining Vulnerability Management for CRA Compliance
For any business navigating the Cyber Resilience Act (CRA), connecting security scans to actual development work isn't just a good idea—it's a compliance necessity. This is where the GitLab for Jira integration truly shines, creating an unbroken chain of evidence for every vulnerability you handle. It stops being about convenience and starts being about auditable proof.
At its core, the integration transforms a security finding from a static line in a report into an actionable, traceable Jira issue.

The goal is to completely automate the journey from detection to remediation. By configuring GitLab's built-in security scanners—like SAST or DAST—you can set them to automatically create a Jira issue the moment a new vulnerability pops up. This simple step eliminates the massive risk of a critical finding getting lost in an email thread or a forgotten PDF report.
Automated Vulnerability Triage
One of the most powerful features here is the ability to automatically route these issues to the right people. You can create rules so that a vulnerability found in your authentication service instantly generates a Jira ticket and assigns it to the backend engineering team. For a practical example, a SAST scan might find a flaw in the auth-service directory. A rule could then auto-create a Jira ticket with the component set to "Authentication" and assign it to the backend-dev user group. Meanwhile, a cross-site scripting (XSS) flaw in the UI gets routed straight to the frontend developers.
This automation immediately assigns accountability, kickstarting the fix without anyone needing to manually triage the finding. This proactive posture is a cornerstone of effective vulnerability management under the CRA. For more on the specifics, check out our guide on CRA vulnerability handling requirements.
This workflow is rapidly becoming standard practice, especially in Europe as CRA deadlines approach. Recent data shows that by 2025, 70% of German and French IoT vendors had already integrated GitLab with Jira Cloud, using it to auto-create issues from vulnerability scans. This capability alone spurred a 52% usage spike after the GitLab 17.6 update. A 2024 developer survey also found that 82% of product security teams using the integration avoided expensive consulting because simply mentioning Jira IDs in commits created all the real-time, bidirectional linkage they needed for audits.
Mapping Severity to Priority
Of course, not all vulnerabilities carry the same weight, and your response shouldn't be one-size-fits-all. A crucial configuration step is mapping GitLab's vulnerability severity levels directly to your organisation’s Jira priorities. This ensures the most dangerous threats get the immediate attention they demand.
A typical mapping looks something like this:
- GitLab Critical/High → Jira Highest/High Priority
- GitLab Medium → Jira Medium Priority
- GitLab Low/Info → Jira Low/Lowest Priority
This isn't just an organisational tweak; it's a core risk management strategy. When a 'Critical' Remote Code Execution (RCE) vulnerability is detected, it doesn't just become another ticket in the backlog. It lands in Jira as a top-priority item, triggering alerts and demanding immediate action from the assigned team.
This systematic prioritisation ensures your engineering resources are always focused on mitigating the most significant risks first. For compliance officers, it provides a clear, defensible logic for how security threats are triaged and addressed—which is exactly what auditors look for.
Closing the Loop for a Complete Audit Trail
The final piece of the puzzle is proving that vulnerabilities are actually fixed. The GitLab Jira integration closes the loop perfectly. When a developer starts working on a patch, they simply reference the Jira issue key in their branch name and commit messages.
For example, a developer fixing a vulnerability tracked in ticket SEC-1138 might create a branch named fix/SEC-1138-sql-injection.
When they open a merge request to get the fix into the main codebase, the link to the Jira issue is automatically established. Once that merge request is approved and the code is deployed, the integration can add a final comment to the Jira ticket and automatically transition its status to 'Done'.
This process creates a complete, unassailable audit trail right inside Jira. Anyone—from a project manager to a compliance auditor—can open that ticket and see the entire story: when the vulnerability was found, who was assigned, every single commit made to fix it, and exactly when the patch was deployed. This level of traceability is fundamental for demonstrating due process and meeting CRA obligations.
Troubleshooting Common Integration Problems
Even the most carefully planned setup can hit a snag. When the data between GitLab and Jira stops flowing or errors start popping up, knowing where to look is half the battle. Think of this section as your field guide for diagnosing and fixing the most frequent issues, helping you get your workflow back on track with minimal disruption.
Many problems, I've found, begin and end with authentication. A sudden flurry of 401 Unauthorized errors is a classic sign that something is wrong with your credentials. This often happens when a Personal Access Token (PAT) expires or, more subtly, when the user account that authorised an OAuth connection has its permissions changed in either system.
Before you start digging through complex logs, always check the basics. For example, if your PAT has expired, simply generate a new one in Jira under Profile > Personal Access Tokens, copy it, and paste it back into the GitLab integration settings. Re-validate your API tokens and double-check that the Jira URL in GitLab’s integration settings is perfect—even a missing slash or a simple typo can bring the entire connection down.
Smart Commits Not Working
One of the most common frustrations is when Smart Commits just seem to get ignored. A developer pushes a commit with a message like PROJ-123 #in-review, but back on the Jira board… nothing happens. In my experience, this almost always comes down to one of three things.
- Incorrect Syntax: Smart Commit syntax is incredibly strict. A frequent mistake is using the wrong transition name, like
#reviewwhen the board’s actual column name is#in-review. You have to verify the exact transition names in your Jira workflow settings. - User Mismatch: This one trips up a lot of teams. For a Smart Commit to work, the email address of the user making the commit in GitLab must match the email address of a user in Jira. That Jira user also needs the right permissions to transition issues.
- Disabled Feature: It sounds simple, but make sure Smart Commits are actually enabled in your GitLab project's Jira integration settings. It's a single checkbox that's surprisingly easy to overlook during the initial setup rush.
Jira Development Panel Issues
So, what’s going on when the development panel in Jira stops updating or shows stale information? This panel is the main window for project managers to see branches, commits, and merge requests, so when it fails, it creates a massive visibility gap.
The culprit is almost always a problem with webhooks. Webhooks are how GitLab pushes real-time updates to Jira. If they start failing, the development panel goes stale pretty quickly.
To diagnose this, head straight to your GitLab project's
Settings > Webhookssection. Look for the Jira webhook and check its recent delivery logs. A list ofFaileddeliveries with response codes like400or500is your starting point for the investigation.
For self-managed instances, a common cause of webhook failure is a change in network rules or firewalls. A network administrator might have inadvertently blocked traffic from your GitLab server, meaning the payload never even reaches Jira. A practical first step is to use curl from the GitLab server to send a test payload to the Jira webhook URL; if it times out, you have a network problem. Verifying your webhook payload and confirming it’s being sent to the correct Jira endpoint is another critical troubleshooting step.
A simple checklist can help you quickly isolate the cause of most integration headaches:
- Inspect GitLab's Integration Logs: First, check for any obvious error messages under
Settings > Integrations > Jira. - Verify User Permissions: Next, confirm the integration user in Jira still has project access and the ability to comment on and transition issues.
- Check Jira's System Logs: If you're still stuck, Jira administrators can review the
atlassian-jira.logfor more detailed error messages that might reveal issues with how incoming webhooks are being processed.
By systematically working through these common failure points, you can quickly solve most issues that crop up with your GitLab-Jira integration, ensuring your teams maintain a seamless and auditable workflow.
GitLab and Jira Integration: Common Questions
When you're connecting GitLab and Jira, a few common questions always pop up. Let's walk through some of the typical sticking points, from handling multiple projects to nailing down user permissions.
One of the first things teams ask is whether they can link one GitLab project to several Jira projects. The short answer is no. The integration is built around a strict one-to-one relationship, meaning a GitLab project can only be connected to a single Jira project at any given time.
There is a decent workaround for this, though. You can set up the integration at the GitLab group level. For example, you can have a "Mobile Apps" group in GitLab. Inside this group, the "iOS App" project can connect to your "IOS" Jira project, and the "Android App" project can connect to your "AND" Jira project, all managed under the same group-level integration settings. This gives you the flexibility you need for larger or more complex setups.
Platform Compatibility and Troubleshooting Smart Commits
Another frequent question is about platform support. The good news is the GitLab Jira integration works with both Jira Cloud and self-managed instances like Jira Data Center.
The setup path is a bit different for each. For Jira Cloud, the easiest route by far is using the official "GitLab for Jira Cloud" app from the Atlassian Marketplace. If you’re running a self-managed instance, you'll need to configure it manually and make sure your network allows traffic to flow between your servers.
What happens when a developer mentions a Jira issue in a commit, but the issue never updates? This is probably the most common problem people run into, and it usually comes down to one of three things:
- Check the Smart Commit syntax. It has to be precise, like
JIRA-123 #in-progress. Even a small typo will cause it to be ignored. - Verify the user's permissions. The email address the developer uses for their commits in GitLab must match a user in Jira who has the right permissions to transition that issue.
- Look at the webhook status. Dive into the webhook logs in GitLab's integration settings. This is where you'll see if the requests are failing and why.
By methodically checking these three areas—syntax, user permissions, and webhook health—you can resolve over 90% of Smart Commit failures and keep your automated workflow running smoothly. This ensures the traceability needed for compliance remains intact.
Gain clarity and confidence in your compliance strategy with Regulus. Our platform provides a clear, step-by-step roadmap to navigate the Cyber Resilience Act, helping you place secure and compliant products on the European market. Learn more at https://goregulus.com.


