

At its core, GitHub CI/CD is the native, integrated way to automate your software builds, tests, and deployments, all handled directly within your GitHub repository. The feature that powers this is called GitHub Actions.
It lets developers cook up custom workflows that kick off automatically based on events like code pushes or new pull requests. This ensures every single change is validated before it ever gets near your users. For any team trying to move faster while keeping quality and security high, this kind of automation isn’t just nice to have—it’s essential.
Why GitHub CI CD Is Essential for Modern Development
In modern software and hardware development, speed and security aren’t trade-offs; they’re parallel necessities. Teams are constantly pushed to ship innovative products faster, but that speed can’t come at the expense of security or regulatory compliance.
This is especially true for manufacturers of IoT devices and other connected products targeting the European market, where regulations like the Cyber Resilience Act (CRA) lay down strict rules.
This is precisely where a solid GitHub CI/CD pipeline becomes a game-changer. It stops being a simple developer convenience and starts becoming a core business strategy for managing risk and guaranteeing market access. By automating all the routine, repeatable tasks, a well-tuned pipeline frees up your engineering teams to focus on actual innovation instead of manual, error-prone processes.
Beyond Basic Automation
The real power of GitHub CI/CD comes from its ability to weave security and compliance checks directly into the development lifecycle. Security is no longer an afterthought—a final, hurried check before release. Instead, it becomes an automated, continuous part of every single code commit. This integrated approach, often called DevSecOps, is the only way to build secure products from the ground up.
For instance, a typical GitHub Actions workflow can automatically:
- Scan code for vulnerabilities using static analysis security testing (SAST) tools.
- Check dependencies for known security issues before they’re ever integrated.
- Generate a Software Bill of Materials (SBOM), creating a transparent inventory of every component in your build.
By automating these critical security jobs, teams can catch and fix issues early in the development process. That’s when they are cheapest and easiest to resolve. This proactive stance is fundamental to building a secure software development life cycle.
Ultimately, GitHub CI/CD acts as the backbone for any modern engineering organisation that needs to be secure and compliant. It delivers the automation needed to ship faster, the integration needed to build in security from day one, and the auditable trail required to prove compliance. For any team building products with digital elements, it’s no longer an option—it’s an essential foundation for success.
Alright, let’s move from theory to action. This is where the real power of a GitHub CI/CD pipeline starts to shine. We’re going to build a solid, secure pipeline right from the ground up, and the first step isn’t writing code—it’s locking down your GitHub repository.
Before you even think about crafting a workflow file, your repository settings need to be dialled in. Think of these initial steps as building a safety net. They ensure your automated pipeline has a secure, controlled environment to run in.
Securing Your Repository Foundation
First things first: branch protection rules. Your main branch, whether it’s called main or master, should never allow direct pushes. This one simple change forces every single modification through a pull request, creating an essential checkpoint for code reviews and all the automated checks we’re about to build.
A great starting point for branch protection includes:
- Requiring a pull request before merging: This is non-negotiable. It guarantees no code slips into the main branch without at least one other person looking at it.
- Requiring status checks to pass before merging: This is where the CI magic happens. You can tell GitHub that your build-and-test workflow must succeed before the merge button even becomes active.
- Requiring conversation resolution before merging: This simple rule keeps discussions tidy and makes sure every reviewer’s comment is properly addressed before a merge.
Next up is managing your secrets—things like API keys, deployment credentials, or signing keys. These should never, ever be hardcoded into your workflow files. Instead, use GitHub’s encrypted secrets. You can add them at either the repository or organisation level under Settings > Secrets and variables > Actions. Your workflow can then pull them in as environment variables without their actual values ever being exposed in logs.
For a practical example, if you need a secret API_TOKEN, you would define it in the GitHub UI and then access it in your workflow like this:
steps:
  - name: Use Secret Token
    run: curl -H "Authorization: Bearer ${{ secrets.API_TOKEN }}" https://api.example.com/data
Crafting Your First Workflow File
With the repository’s foundation secured, it’s time to define the automation itself. GitHub Actions workflows are just YAML files that live in a .github/workflows/ directory in your repo. You can have as many as you need, each triggered by different events.
Let’s create a basic workflow called build-and-test.yml for a simple firmware project. This file will set up a pipeline that kicks off every time code is pushed to the main branch or a pull request is opened against it.
This kind of automation isn’t just a niche practice anymore; it’s rapidly becoming the standard. The adoption of CI/CD is surging, with over 50% of npm-related GitHub repositories using some form of CI/CD by mid-2021. And with GitHub Actions running over five million workflows daily, it’s become a critical tool for IoT vendors needing to meet their update obligations. You can dig into more detailed stats on this growth in this research on CI/CD adoption.
Here’s a practical example of what that build-and-test.yml file might look like:
name: Firmware Build and Test

on:
  push:
    branches: [ main ]
  pull_request:
    branches: [ main ]

jobs:
  build:
    runs-on: ubuntu-latest

    steps:
      - name: Checkout repository code
        uses: actions/checkout@v4

      - name: Set up build environment
        uses: actions/setup-node@v4
        with:
          node-version: '20'

      - name: Install dependencies
        run: npm install

      - name: Run unit tests
        run: npm test
Dissecting the YAML:
name: This is just a human-friendly name for your workflow that shows up in the Actions tab.on: The trigger. Here, the workflow runs onpushandpull_requestevents targeting themainbranch.jobs: A workflow is made of one or more jobs. This one has a single job calledbuild.runs-on: This tells GitHub what kind of virtual machine to run the job on.ubuntu-latestis a common, cost-effective choice.steps: A sequence of tasks that run inside a job. Each step can either run shell commands or use a pre-built action.uses: This keyword pulls in a specific action from the GitHub Marketplace, likeactions/checkoutto grab your code oractions/setup-nodeto get the environment ready. As a next step, you could check dependencies for known vulnerabilities right here in the pipeline.run: This executes standard command-line instructions, like installing packages or running your tests.
Once you commit this file, GitHub finds it automatically and gets ready to run the workflow.
You can watch it all happen in real-time under the “Actions” tab of your repository.
This view gives you a live log of every step, making it incredibly easy to see what worked and quickly figure out what went wrong.
Just by combining secure repository settings with a simple, declarative workflow file, you’ve already built a powerful CI pipeline. It automates essential quality checks and gives you a rock-solid foundation for layering on more advanced security and deployment steps down the road.
Okay, you’ve got a basic build-and-test pipeline running. That’s a solid start. Now it’s time to layer in the automated security and compliance checks that turn your GitHub CI CD process from a simple build tool into a real DevSecOps engine.
This is where your pipeline starts actively hardening your product’s security posture with every single commit.
We’re aiming to “shift security left”—catching vulnerabilities and compliance problems early in the development cycle, not right before a release. It’s monumentally easier and cheaper to fix an issue then and there, rather than after it’s been merged and buried under layers of new code. Your pipeline becomes the first line of defence, making security an integral part of how you build, not just a final gate to pass.
This simple flow shows how code moves from the repository, through the automated pipeline, and on to deployment.
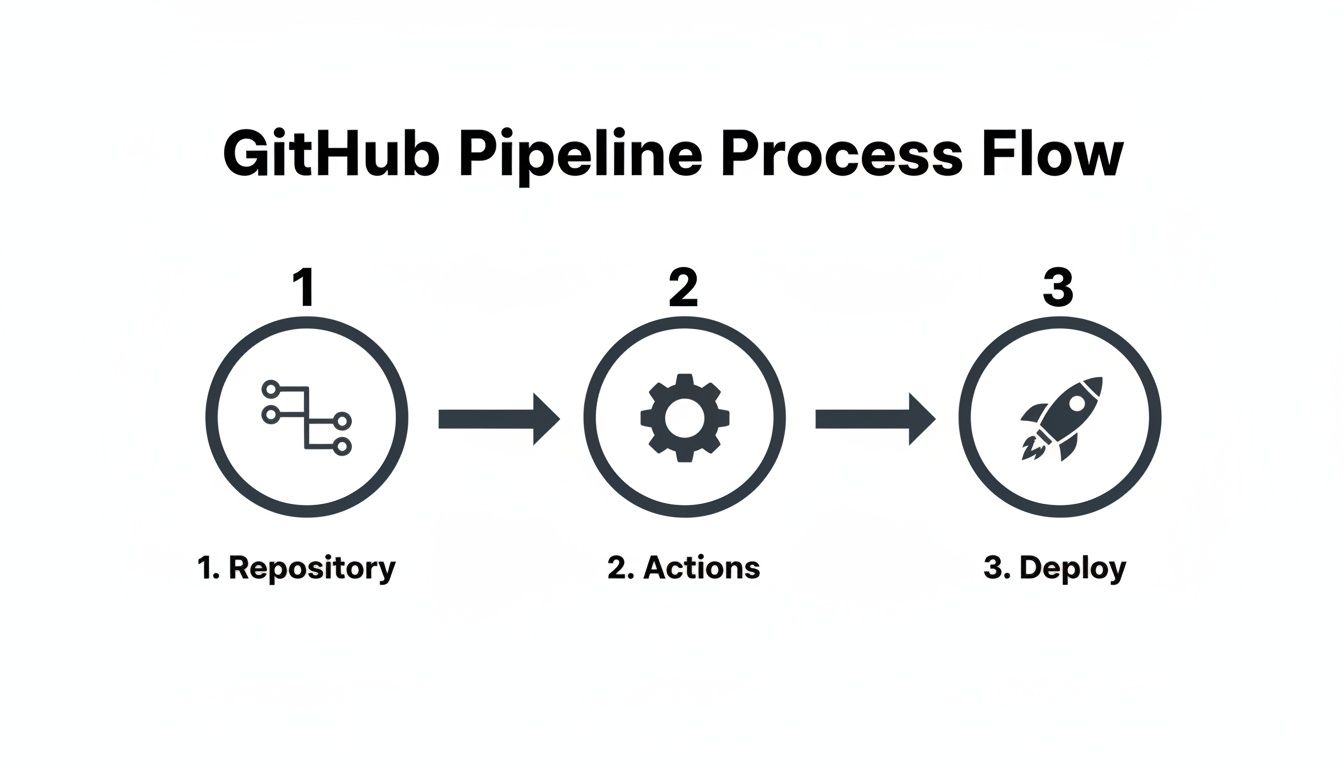
Think of GitHub Actions as the central nervous system that validates, tests, and secures your code between the moment a developer pushes it and the moment it’s released.
Introducing Automated Vulnerability Scanning
A non-negotiable first step is Static Analysis Security Testing, or SAST. This is where tools scan your source code for potential vulnerabilities without ever running it. For this, GitHub’s own CodeQL is fantastic because it’s so tightly integrated. It’s brilliant at spotting common but dangerous flaws like SQL injection, cross-site scripting, and buffer overflows right in your repository.
Adding CodeQL to your workflow is surprisingly simple. You just add another job to your YAML file that uses the github/codeql-action. This action sets up CodeQL, lets it hook into your build process to observe the code, and then runs the analysis.
Here’s what that looks like in practice, slotted right into your workflow YAML:
jobs:
  build:
    # ... your existing build job ...

  security-scan:
    name: CodeQL Scan
    runs-on: ubuntu-latest
    needs: build # Make sure this runs only after a successful build
    permissions:
      security-events: write # This permission is needed to post results back to GitHub

    steps:
      - name: Checkout repository
        uses: actions/checkout@v4

      # First, initialise the CodeQL analysis
      - name: Initialize CodeQL
        uses: github/codeql-action/init@v3
        with:
          languages: 'javascript' # Tell CodeQL what language to look for

      # Now, build your project. CodeQL watches this process.
      - name: Autobuild
        uses: github/codeql-action/autobuild@v3

      # Finally, run the analysis
      - name: Perform CodeQL Analysis
        uses: github/codeql-action/analyze@v3
With this in place, every push and pull request automatically triggers a scan. The findings pop up directly in the “Security” tab of your repository, giving developers clear, actionable feedback before a single line of vulnerable code gets merged.
Generating a Software Bill of Materials (SBOM)
If you’re shipping products into the EU, you’re going to hear a lot about the Cyber Resilience Act (CRA). And for CRA compliance, a Software Bill of Materials (SBOM) is an absolute must-have. Think of an SBOM as a detailed ingredients list for your software—it inventories every single component, library, and dependency you’ve used.
This inventory provides the transparency you need to manage vulnerabilities effectively, which is a core requirement of the regulation. Luckily, you can automate this right inside your GitHub CI CD pipeline.
An SBOM isn’t just a list; it’s a critical compliance artefact. Automating its creation ensures it’s always accurate and up-to-date with every build, providing an auditable record of your software’s composition. To dig deeper, you can explore the specifics of https://goregulus.com/cra-requirements/cra-sbom-requirements/ and see how they map to this process.
You can easily add a step to your workflow using an action from the GitHub Marketplace. This example uses a popular action to generate an SBOM in the standard CycloneDX format for a Node.js project.
      - name: Generate SBOM
        uses: anchore/sbom-action@v0
        with:
          format: 'cyclonedx-json' # Or 'spdx-json'
          output-file: 'sbom.json'

      - name: Upload SBOM as Artifact
        uses: actions/upload-artifact@v4
        with:
          name: sbom-report
          path: sbom.json
This snippet first creates the SBOM file and then immediately archives it as a build artefact. This makes the SBOM easy to download from the workflow’s summary page, ready for compliance audits or customer requests.
Key Security Stages in a GitHub CI CD Pipeline
To bring this all together, it helps to visualise where these automated security checks fit into the pipeline. Each stage serves a specific purpose, contributing to a stronger, more compliant end product.
| Security Stage | Tool/Action Example | Purpose | Compliance Benefit |
|---|---|---|---|
| Static Code Analysis | github/codeql-action |
Scans source code for vulnerabilities before compilation. | Demonstrates "secure by design" principles; finds flaws early (CRA, ISO 27001). |
| Dependency Scanning | dependabot, snyk/actions |
Checks third-party libraries for known vulnerabilities (CVEs). | Provides supply chain visibility; essential for vulnerability management (CRA Annex I). |
| SBOM Generation | anchore/sbom-action |
Creates a comprehensive inventory of all software components. | Fulfills mandatory transparency requirements (CRA); enables rapid vulnerability response. |
| Container Image Scanning | trivy-action, docker/scan |
Scans container images for vulnerabilities in the OS and application layers. | Secures the final deployment artefact; reduces the risk of runtime exploits. |
| Secrets Scanning | trufflesecurity/trufflehog |
Detects hard-coded secrets like API keys or passwords in the codebase. | Prevents accidental exposure of credentials; supports secure configuration (ISO 27001). |
This table shows how a few well-placed automated actions can build a robust security foundation directly within your development workflow.
Connecting the Dots to Compliance
Every automated check you weave into your pipeline does more than just find bugs. It builds an undeniable, auditable trail of due diligence. When a regulator or auditor asks how you ensure your products are secure, you don't just give them a policy document—you point them to your workflow files and the execution logs from every single build.
To make this truly effective, a solid understanding of frameworks like the ISO 27001 certification requirements is incredibly valuable. This framework gives you a structured way to think about information security management that aligns perfectly with the automated controls in a DevSecOps pipeline. Your GitHub Actions workflow becomes the living proof that your security best practices are being enforced, consistently and automatically, on every single change.
Automating Artifact Signing, Releases, and Updates
Once your pipeline has successfully built your code, run through its tests, and passed all the security checks, the focus shifts from integration to delivery. This is the “CD” half of GitHub CI/CD, and it’s all about getting your software into the hands of users securely and reliably. A critical, non-negotiable step here is guaranteeing the integrity of your built artifacts.
You absolutely need to be certain that the firmware binary or software package a user downloads is the exact one your trusted pipeline produced—unaltered and authentic. This is where cryptographic signing comes in.
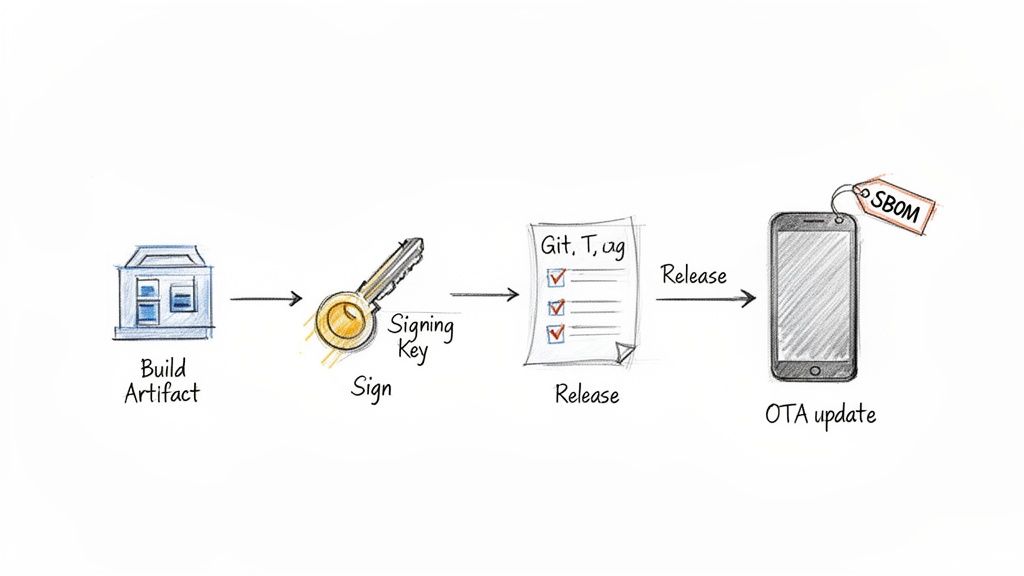
Implementing Automated Artifact Signing
Signing an artifact creates a digital signature that acts as a tamper-proof seal. Anyone can verify this signature to confirm the artifact’s origin and that it hasn’t been touched since it was signed. By baking this into GitHub Actions, you ensure it happens consistently for every single release.
A modern and increasingly popular tool for this is Sigstore, a Linux Foundation project that makes software signing simple and secure, minus the headache of managing long-lived keys. Let’s look at how you’d integrate it into a workflow.
The beauty of Sigstore is its keyless signing capability. Instead of storing and protecting GPG private keys as secrets, authentication is tied directly to your GitHub identity via OpenID Connect (OIDC)—a much safer approach.
Here’s a practical example of a job that signs a compiled binary (firmware.bin) using the sigstore/cosign-installer action.
sign-release-artifacts:
  name: Sign Release Artifacts
  runs-on: ubuntu-latest
  needs: security-scan # Depends on the previous security job
  permissions:
    id-token: write # Required for keyless signing with OIDC
    contents: write # Required to upload signatures to the release
    packages: write # Required if pushing to a container registry

  steps:
    - name: Download firmware binary
      uses: actions/download-artifact@v4
      with:
        name: firmware-binary

    - name: Install Cosign
      uses: sigstore/cosign-installer@v3

    - name: Sign the binary with Cosign
      run: cosign sign --yes firmware.bin
      # Cosign will automatically use the workflow's OIDC token for keyless signing

    - name: Upload signature as artifact
      uses: actions/upload-artifact@v4
      with:
        name: firmware-signature
        path: firmware.bin.sig
This job downloads the binary, installs the cosign tool, and then signs the artifact. The --yes flag confirms the action, and because we’ve granted id-token: write permissions, cosign seamlessly authenticates with Sigstore using the workflow's temporary identity. The resulting signature file is then uploaded as a separate artifact.
Automating GitHub Releases
With your artifacts built, scanned, and signed, the next logical step is to package everything up into a clean, official release. Manually creating release notes, uploading binaries, and attaching SBOMs is tedious and a recipe for human error. A GitHub CI/CD pipeline can automate this entire process beautifully.
The goal is to trigger this release job only when a new version tag (like v1.2.0) is pushed to the repository.
Here’s how you can build a job to automate the creation of a GitHub Release:
- Trigger on Tag Push: The workflow only kicks off when a tag matching a specific pattern is pushed.
- Generate Release Notes: It automatically creates release notes based on the commit messages since the last tag.
- Upload Artifacts: It attaches the signed binary, the signature file, and the SBOM to the new release.
This example uses the softprops/action-gh-release action, a popular and reliable choice for this task.
create-release:
  name: Create GitHub Release
  runs-on: ubuntu-latest
  needs: [sign-release-artifacts] # Runs after artifacts are signed
  if: startsWith(github.ref, 'refs/tags/') # Only run for tags

  steps:
    - name: Download all artifacts
      uses: actions/download-artifact@v4
      with:
        path: ./artifacts

    - name: Create Release and Upload Assets
      uses: softprops/action-gh-release@v2
      with:
        generate_release_notes: true # Auto-generates release notes
        files: |
          ./artifacts/firmware-binary/firmware.bin
          ./artifacts/firmware-signature/firmware.bin.sig
          ./artifacts/sbom-report/sbom.json
Now, whenever a developer pushes a tag like v1.2.1, this job will spring into action. It automatically creates a new draft release on GitHub, populates it with release notes, and attaches all the necessary files. Your release process just became consistent, repeatable, and fully documented.
Orchestrating Secure Over-the-Air Updates
For IoT and hardware teams, the release process doesn't end at GitHub. The final mile is often delivering that new firmware to devices in the field via an Over-the-Air (OTA) update. GitHub Actions can serve as the central orchestrator for this critical process.
Post-market surveillance and the ability to deliver timely security patches are core tenets of modern device manufacturing. For those navigating EU regulations, this capability is not just a best practice but a legal requirement. You can explore more on these obligations by understanding the Cyber Resilience Act's update requirements.
While the exact implementation will depend on your OTA provider's API, the concept is straightforward. After a release is successfully published on GitHub, a final job in your workflow can be triggered to handle the deployment.
This job would typically:
- Authenticate with your OTA service, using a secret stored in GitHub.
- Make an API call to notify the service that a new firmware version is available.
- Provide the URL to the signed binary, pointing to the asset in the newly created GitHub Release.
Here's a conceptual example of what that final job might look like:
deploy-to-ota:
  name: Deploy to OTA Service
  runs-on: ubuntu-latest
  needs: create-release # Trigger after the release is published
  if: startsWith(github.ref, 'refs/tags/')

  steps:
    - name: Notify OTA Service
      run: |
        curl -X POST
        -H "Authorization: Bearer ${{ secrets.OTA_SERVICE_API_KEY }}"
        -H "Content-Type: application/json"
        -d '{
          "version": "${{ github.ref_name }}",
          "firmware_url": "https://github.com/${{ github.repository }}/releases/download/${{ github.ref_name }}/firmware.bin"
        }'
        https://api.otaservice.com/v1/deployments
This closes the loop on your entire delivery pipeline. A single git push --tags command can now securely build, test, scan, sign, release, and initiate the deployment of a critical security patch to your entire fleet of devices. It's all orchestrated seamlessly through your GitHub CI/CD workflow.
Advanced Strategies for Robust and Compliant Pipelines
As your GitHub CI CD pipelines grow up, they evolve from simple build-and-test scripts into complex, mission-critical systems. At this point, the game changes. The focus shifts from just getting things to work to ensuring efficiency, maintainability, and enterprise-grade control. This is especially true in regulated industries where every action needs to be auditable and strictly enforced.
When you're scaling operations, you can no longer afford to have duplicated code scattered across dozens of workflow files. Every tiny change becomes a monumental task. This is the moment you need to start thinking in terms of reusable components and smarter execution strategies to keep your pipelines lean, mean, and powerful.
Streamlining with Reusable Workflows and Composite Actions
One of the biggest headaches in a growing CI/CD setup is repetition. If you have multiple repositories that all need to run the same security scan or deployment logic, copying and pasting YAML is a recipe for disaster. This is where reusable workflows and composite actions become your best friends.
- Reusable Workflows: Think of these as complete, callable pipelines. You define a workflow once, and other workflows can call it. This is perfect for standardising entire processes across your organisation, like a company-wide security audit or a release procedure, making sure every team follows the exact same playbook.
- Composite Actions: These are smaller, custom actions you build right inside your own repository. They bundle several steps into a single, neat action. They're ideal for company-specific tasks, like setting up a proprietary build environment or interacting with an internal API.
In short, reusable workflows let you standardise entire processes, while composite actions are the custom building blocks you create to simplify individual jobs.
Enforcing Control with Environments and Required Reviewers
For anyone in a compliance-heavy industry, a fully automated pipeline straight to production is often a non-starter. You almost always need a manual "go/no-go" from a real person before a release goes live. GitHub Environments provide a formal mechanism for this, acting as a powerful gatekeeper for your deployments.
You can configure an environment (like production) with specific protection rules. A common and incredibly effective rule is requiring approval from a designated team or individual. When a workflow job targets this protected environment, it automatically pauses and waits for that manual approval right in the GitHub UI before it can proceed.
Here's a practical example of a deployment job gated by an environment:
deploy:
  name: Deploy to Production
  runs-on: ubuntu-latest
  needs: sign-release-artifacts
  environment:
    name: production # This job now targets the 'production' environment
    url: https://my-app.com # Optional: URL to display

  steps:
    - name: Deploy application
      run: echo "Deploying to production..."
This creates a crystal-clear, auditable checkpoint. The deployment log will show exactly who approved the release and when, giving you the concrete evidence needed for compliance audits that an authorised change control process was followed.
This feature is invaluable for enforcing separation of duties and ensuring a final, human-led review happens before any changes impact your end-users.
Optimising Speed with Matrix Builds and Caching
Pipeline efficiency isn't just a nice-to-have; it's a competitive advantage. Slow builds create developer friction and delay the delivery of critical updates. Two of the most effective ways to speed up your GitHub CI CD workflows are matrix builds and dependency caching.
A matrix build lets you test your project across multiple combinations of variables at the same time. Instead of running separate, sequential jobs to test on different operating systems or language versions, a matrix strategy spins them all up in parallel. For anyone building cross-platform firmware or software, this is an absolute game-changer.
Here’s a practical example for testing a Node.js application across different versions and operating systems:
jobs:
  test:
    runs-on: ${{ matrix.os }}
    strategy:
      matrix:
        os: [ubuntu-latest, windows-latest, macos-latest]
        node-version: [18, 20, 22]

    steps:
    - uses: actions/checkout@v4
    - name: Use Node.js ${{ matrix.node-version }}
      uses: actions/setup-node@v4
      with:
        node-version: ${{ matrix.node-version }}

    # ... rest of your test steps
This simple setup creates nine parallel jobs, dramatically slashing the total time needed to validate your code.
Just as important is caching. Downloading all your dependencies on every single run is a massive time sink. The actions/cache action lets you store these dependencies and restore them on subsequent runs, often shaving precious minutes off your build times.
    - name: Cache npm dependencies
      uses: actions/cache@v4
      with:
        path: ~/.npm
        key: ${{ runner.os }}-node-${{ hashFiles('**/package-lock.json') }}
        restore-keys: |
          ${{ runner.os }}-node-
The reliability of these advanced features is a key reason for GitHub Actions' massive success. In the ES region, its adoption rate soared to 51% among surveyed teams from 2019-2023. And while a surprising 18.8% of CI configurations are eventually abandoned globally, GitHub Actions has the lowest rate at just 7.3%, proving it has the staying power for serious, long-term projects. You can explore more about these GitHub Actions usage trends. To ensure your pipelines are not just robust but also maintainable for the long haul, it's worth reviewing these essential CI/CD pipeline best practices.
Frequently Asked Questions About GitHub CI/CD
As you start embedding GitHub Actions deeper into your development lifecycle, a few common questions always seem to pop up. Here are some straightforward answers based on what we see teams grappling with day-to-day.
Can I Use GitHub Actions for More Than Just CI/CD?
Absolutely. Thinking of GitHub Actions as just a CI/CD tool is a bit like thinking of a Swiss Army knife as just a knife. It’s a powerful, general-purpose automation engine that you can point at almost any task in your repository.
We’ve seen it used for all sorts of clever things:
- Automated Issue Triage: A workflow can automatically slap labels on new issues based on keywords, assign them to the right team, or even gently nudge people to close stale issues that have been sitting idle for too long.
- Scheduled Housekeeping: Using
on: schedulewith a cron expression is perfect for running tasks on a regular cadence. Think daily data backups, weekly dependency health checks, or even hourly performance monitoring reports. - Keeping Everyone in the Loop: You can easily build a workflow that pings a Slack channel or cuts a Jira ticket the moment a new release goes live. No more manual announcements.
The real power here is automating away the repetitive, manual chores that distract your team from building great products.
How Do I Choose Between GitHub-Hosted and Self-Hosted Runners?
This is a classic trade-off between convenience, cost, and control. There’s no single right answer, but there’s usually a right answer for you.
-
GitHub-Hosted Runners: These are the default for a reason. They’re perfect for the vast majority of projects. You get a clean, fresh virtual machine for every single job, GitHub handles all the patching and maintenance, and they’re always ready to go. For public repositories and standard build processes without weird hardware needs, they’re a no-brainer.
-
Self-Hosted Runners: You’ll want to spin up your own runners when you hit a wall with what the standard ones can do. The classic triggers are needing a specific hardware architecture (like ARM for certain embedded devices), requiring a GPU, or needing direct access to on-prem resources sitting behind a corporate firewall. They can also be cheaper if you have a private repo with a massive build volume, but remember—you’re on the hook for their maintenance, security, and uptime.
Our Takeaway: Always start with GitHub-hosted runners. They're simpler, more secure, and let you focus on your workflow logic. Only make the jump to self-hosted when you have a concrete technical requirement that the standard runners simply can't meet.
Is GitHub CI/CD Free to Use?
Yes, and the free tier is surprisingly generous.
For any public repository, GitHub Actions is completely free. No strings attached.
For private repositories, you get a free monthly allowance of build minutes and storage. As of 2024, that’s typically 2,000 minutes per month on standard GitHub-hosted runners, which is plenty for small teams or projects just getting started.
Once you burn through that free allowance, you’re billed on a pay-as-you-go model. For teams running a huge number of builds, it can become more economical to either purchase larger runners or switch to self-hosted runners to manage costs more predictably.
Are you getting ready for the EU's Cyber Resilience Act? Regulus can help. Our platform makes CRA compliance straightforward by turning dense regulatory text into a clear, actionable roadmap. We help you generate the evidence and documentation you need directly from your development lifecycle, giving you confidence in your compliance journey. Visit us at https://goregulus.com to see how it works.


